How to configure on-prem storage with Comet
This guide instructs users on setting up on-prem storage using Self-Hosted Storage Gateway.
We recommend users to set up on-prem storage this way to benefit fully from this functionality.
For a more technical overview on how on-prem storage works with Comet, as well as detailed information on requirements to configure specific storage types, please visit our storage technical documentation.
Storage Gateway
To use on-prem storage, Self-Hosted Comet needs to be installed and configured with Storage Gateway enabled. This can be configured on the Storage Gateway, which is the part of Comet responsible for receiving and replicating any data uploaded by a Comet Backup account.
When this role is enabled, the following data files are used:
cometd-buckets.db, this file contains metadata and authentication information for all Storage Vaults. The expected file-size is small. It is not safe to copy these.dbfiles while the Comet Storage Gateway is running.- In
cometd.cfg, theStorageRole > RoleEnabledoption configures whether the Storage Gateway is enabled.
The Storage Gateway is only available on a Self-Hosted Server.
How to configure Storage Gateway
Step 1:
In the Self-Hosted Server, go to Settings > Storage Gateway, and click on the plus sign.

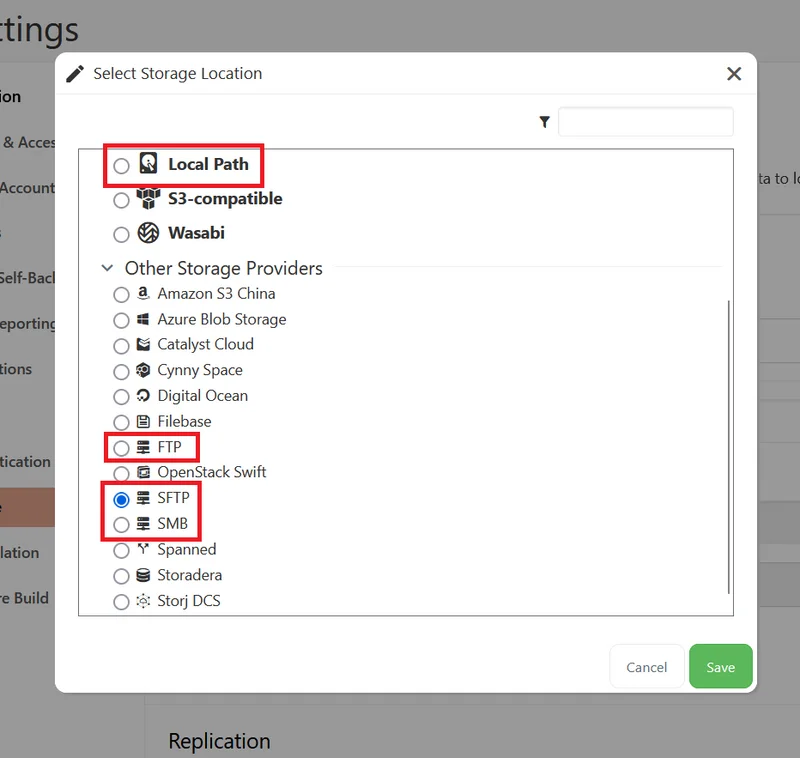
Step 2: Choose the on-prem storage type you would like to configure. Comet supports local path, SFTP, FTP, and SMB storage.
Refer to our storage configuration guide for technical details and requirements for configuring each storage type.
Step 3:
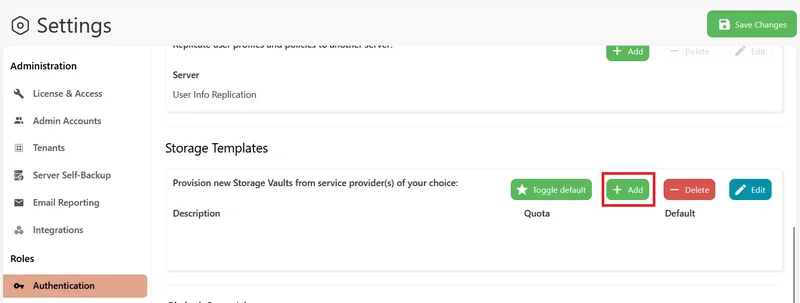
After configuring the on-prem storage in Storage Gateway, go to the Storage Templates tab on a Management Console and set up the Storage Gateway as a Storage Template. Click on 'Add'.
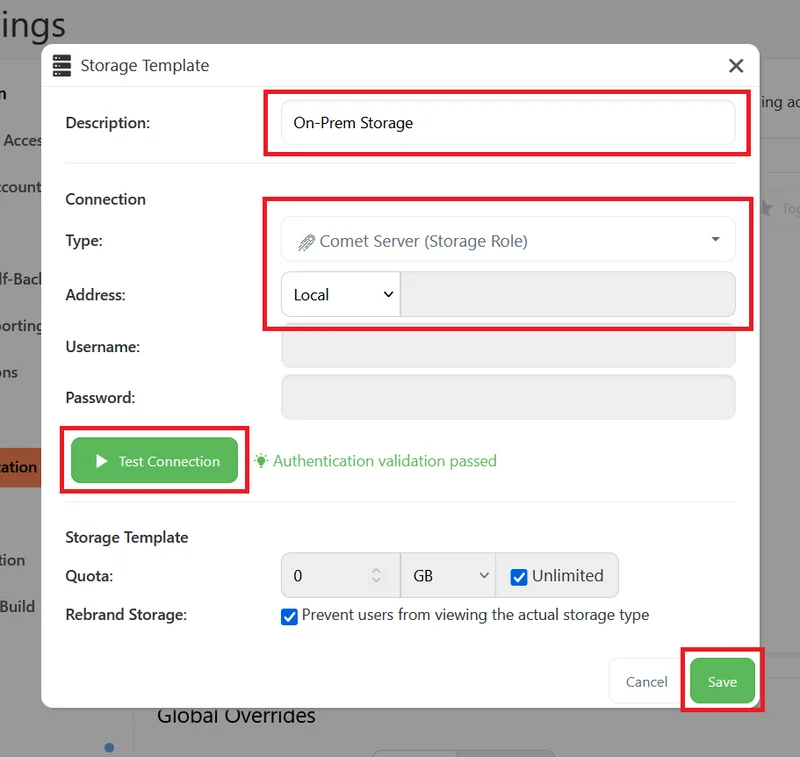
Step 4: Make sure that the storage Type is pointed to Comet Backup (Storage Gateway), and the address is set to Local.
The storage can be re-named in the Description field, and you can click on 'Test connection' to confirm that the storage can be reached.
Click on ‘Save’ after completing the configuration.
Once the Storage Gateway has been configured as a Storage Template, a Storage Vault can be automatically requested. This is covered in the next section.
How to configure a Storage Vault
A Storage Vault is a location where the backed-up data can be stored, and are configured per user profile. All data within a Storage Vault is compressed, encrypted, and deduplicated. A Storage Vault is the unit of deduplication; data is not deduplicated between multiple Storage Vaults.
Steps to configure a Storage Vault (Server)
For existing users:
Step 1: Access the user profile you would like to configure a Storage Vault for, and go to the Storage Vaults tab.
Step 2:
Click on ‘Add new vault’, and click on the Storage Template.

Step 3:
A Storage Vault will automatically be requested from the template and will be available to use for backups.

For new users:
Step 1:
When adding a new user, make sure to choose the correct on-prem Storage Template.
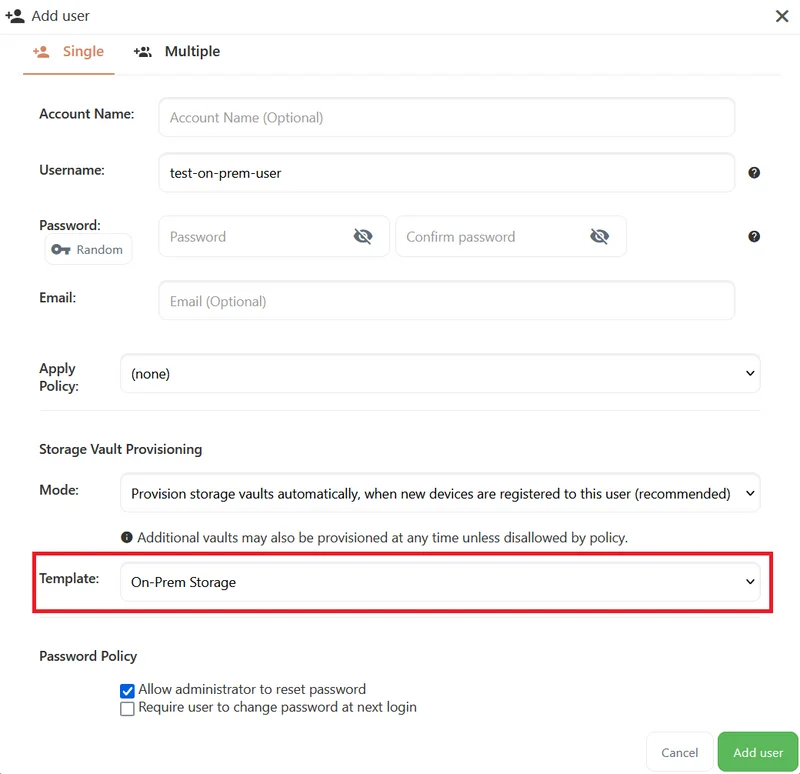
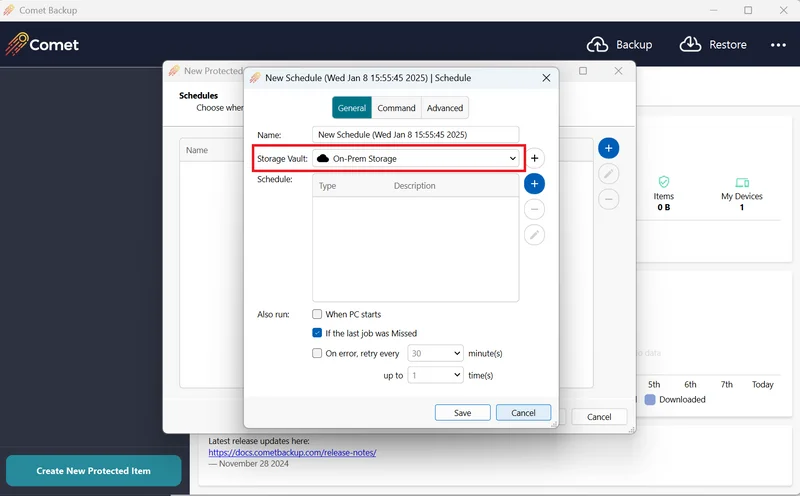
Step 2: Once a device is registered to this user, a Storage Vault will be requested from the Storage Template to store backups for this device.
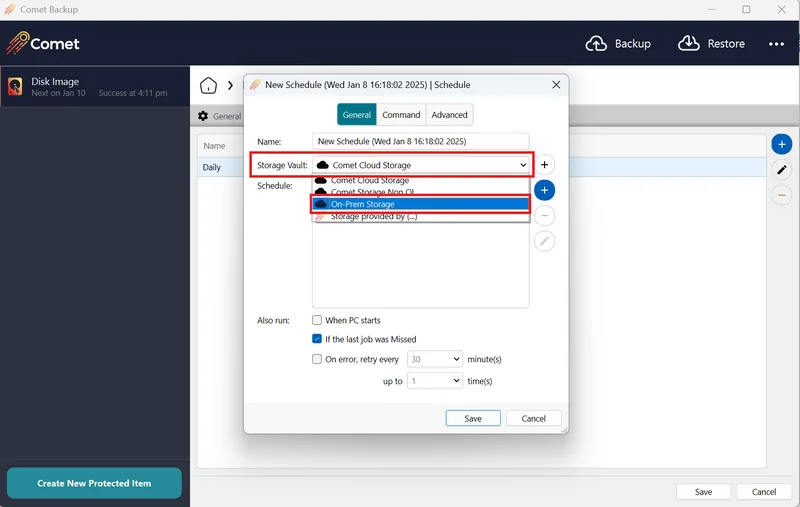
This will be available when you set up a backup schedule.
Steps to configure a Storage Vault (Client)
A Storage Vault can also be requested from a Storage Template on the Comet Backup Client following these steps:
Step 1:
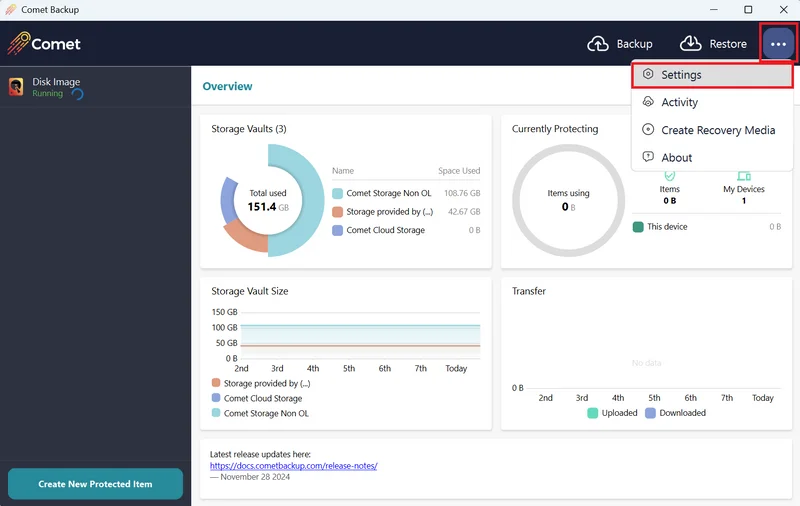
On the Comet Backup Client, click on the ellipsis, and then Settings.
Step 2:
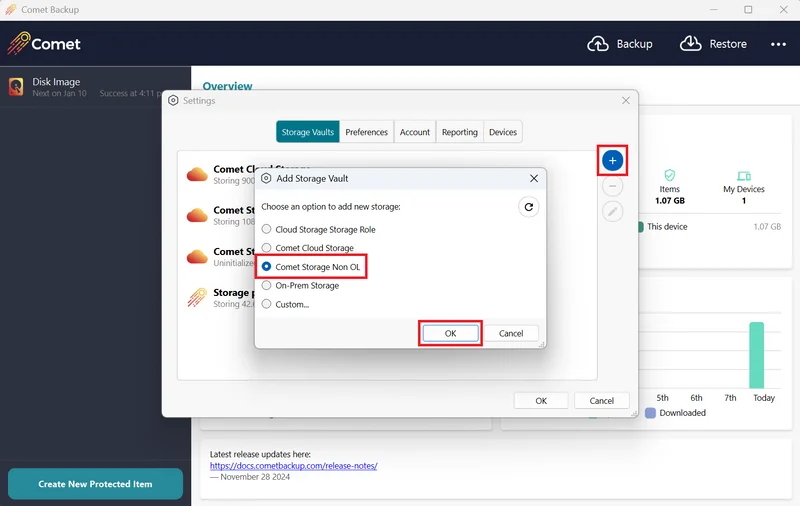
Here, click on the plus sign. Click on the Storage Template you would like to request a Storage Vault from, and click on OK.
Step 3:
The Storage Vault is now available to use. Make sure to select it when configuring a backup schedule to ensure backups are being directed to the on-prem storage.
