How to set up MFA
Multi-Factor Authentication on your Comet Account Portal
Multi-factor authentication (MFA) is an additional layer of protection for your Comet Account Portal. When this feature is enabled, a second layer of authentication is required to log in to the web interface. Your password alone is insufficient to log in to the interface.
One-Time Code is supported, the six-digit code changes every 30 seconds.
Steps to enable MFA on your Comet Account Portal
-
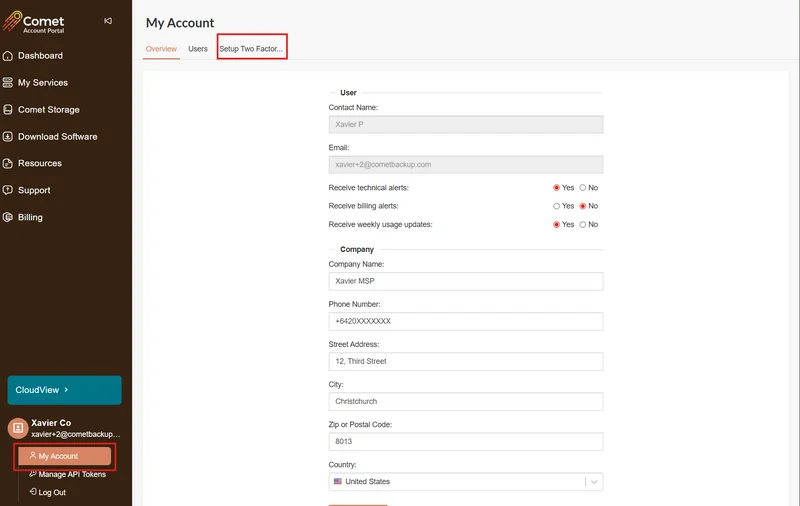
In your Comet Account Portal, head to My Account, then select ‘Setup Two Factor…’
-
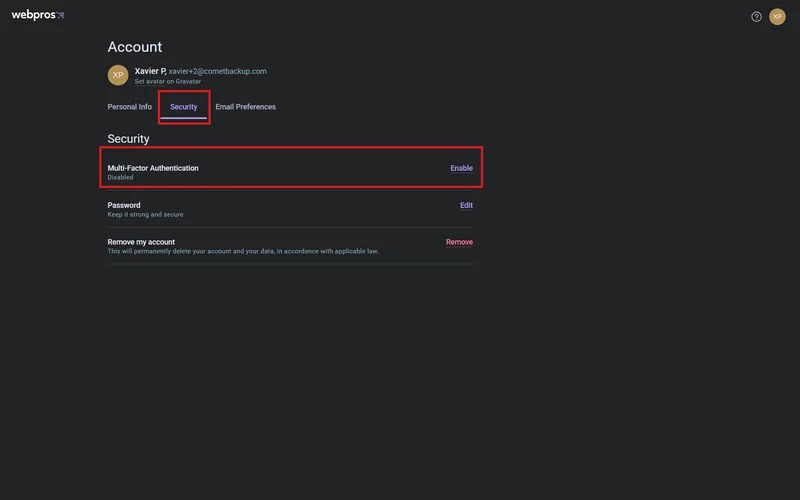
You’ll be directed to the Security section of your WebPros Account Portal. Select ‘Enable’ to enable Multi-Factor Authentication.
-
Scan the QR code using your preferred authenticator application (e.g. Microsoft Authenticator, Google Authenticator, Bitwarden, etc.), then enter the provided one-time code.
_Note: If you have trouble scanning, select ‘Trouble Scanning’. Copy the code displayed and paste it on your authentication application, then enter the provided one-time code. _


Steps to log in when you lose access to your authentication device
Please reach out to hello@cometbackup.com.
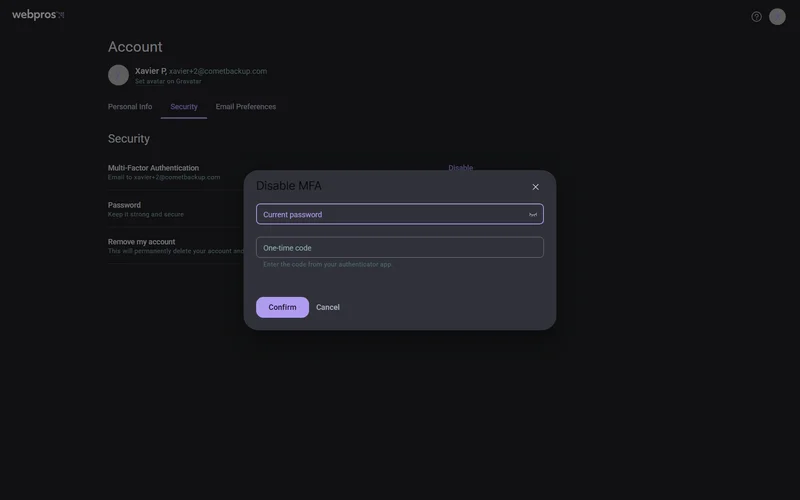
Steps to disable MFA on your Comet Account Portal
- In your Comet Account Portal, head to My Account, then select ‘Setup Two Factor…’.
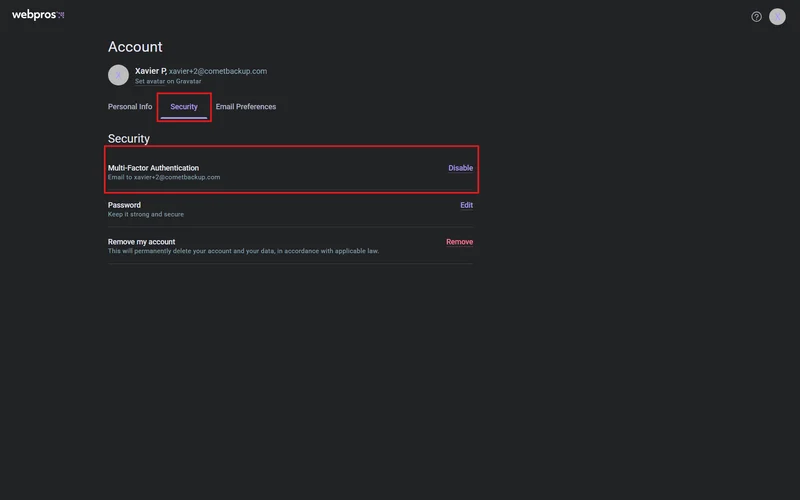
- You’ll be directed to the Security section your WebPros Account Portal. Select ‘Disable’ to disable Multi-Factor Authentication.
- Enter your current password and one-time code from your authentication device. Click on ‘Confirm’ to disable MFA.


Multi-Factor Authentication (MFA) on the Management Console
There are up to two ways users can log in to their Management Console, depending on the deployment type.
| Log-in method | Comet-Hosted | Self-Hosted |
|---|---|---|
| Comet Account Portal email address | Supported | Not supported |
| Username and password | Supported | Supported |
MFA configuration when logging in with your Comet Account Portal email address
Once MFA is configured for your Comet Account Portal, it is also enforced on your Comet-Hosted Management Console when you attempt to log in with your email address. No further MFA configuration required.
Note: This is only available for Comet-Hosted
MFA configuration when logging in using username
An alternative way to log in to your Management Console is via username and password. MFA can be set up on your Management Console. MFA options:
| MFA option | Comet-Hosted | Self-Hosted |
|---|---|---|
| Time-based One Time Password (TOTP) | Supported | Supported |
| Fast IDentity Online 2 WebAuthn (FIDO2 WebAuthn) | Supported | Supported |
| External authentication sources | Not supported | Supported |
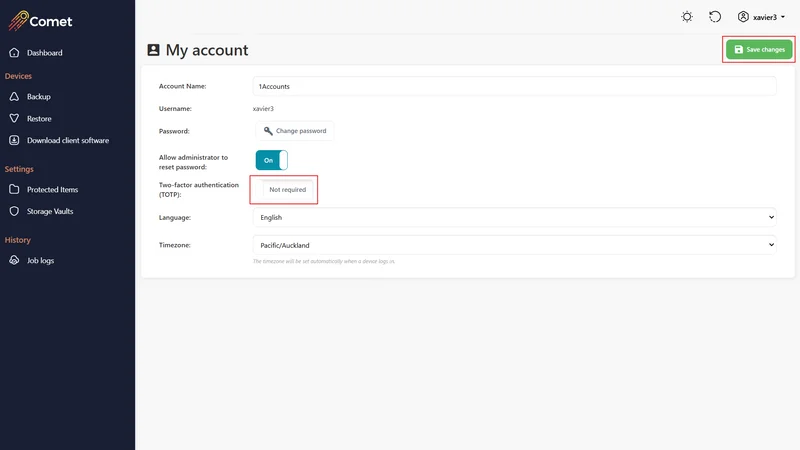
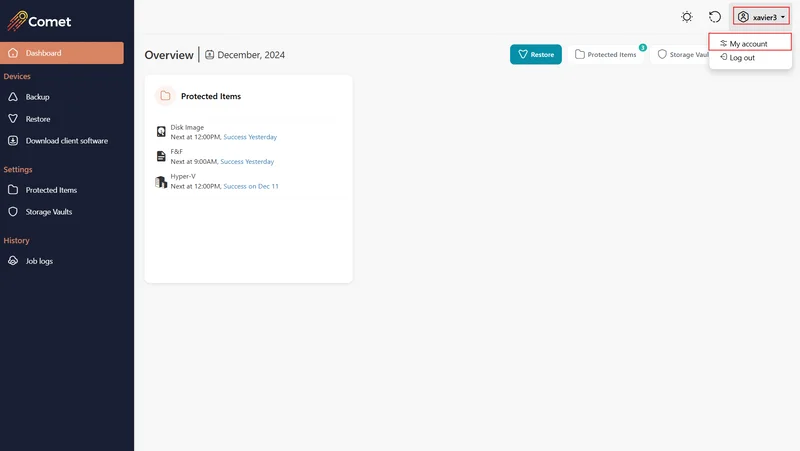
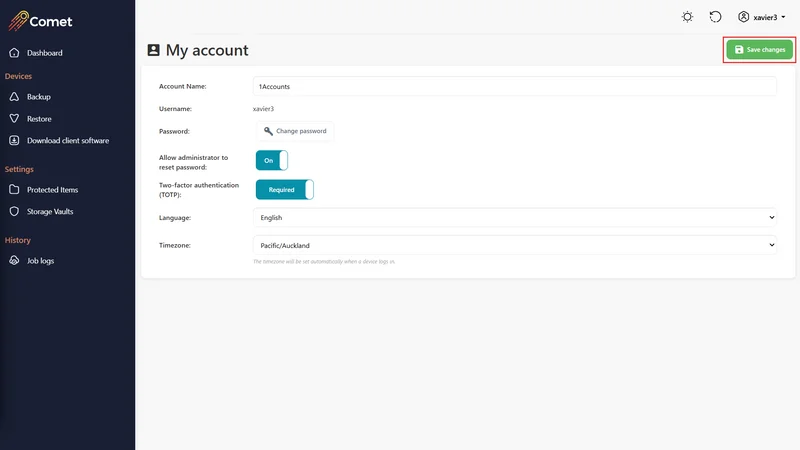
Steps to configure TOTP for Management Console
- Click the dropdown list and select ‘My Account’
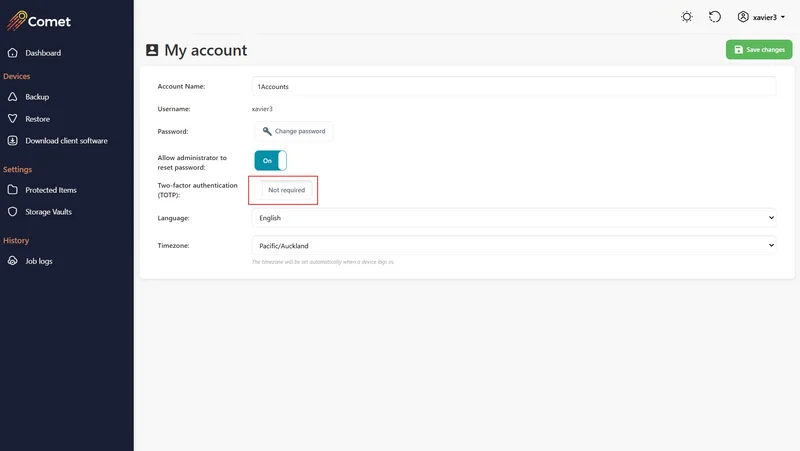
- Turn on the toggle next to Two-factor authentication (TOTP)
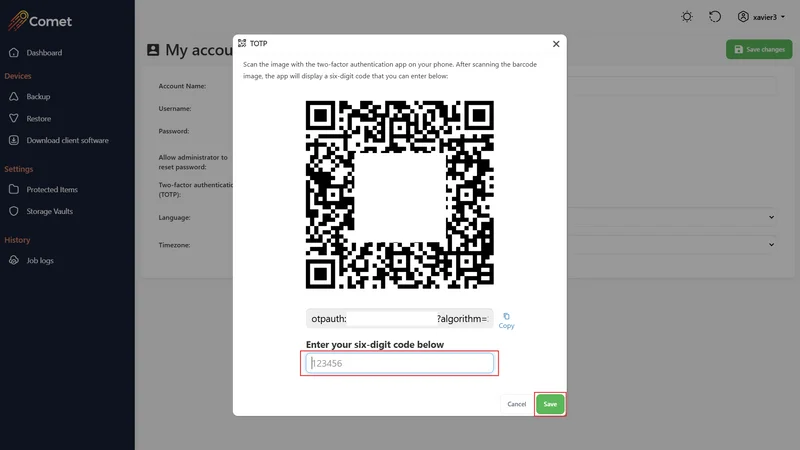
- Scan the QR code TOTP application or enter the code manually using your preferred authenticator application (e.g. Microsoft Authenticator, Google Authenticator, Bitwarden, etc.) or enter the code manually, then enter the provided one-time code
- Click ‘Save’ to complete your setup
Steps to update and remove TOTP for Management Console
- Turn off the toggle next to Two-factor authentication (TOTP) to remove the existing MFA.
- To use a new TOTP device, turn the toggle on and re-configure TOTP.
Steps to configure FIDO2 WebAuthn for Management Console
Comet Management Console supports the use of WebAuthn authenticator as a multi-factor authenticator for administrator accounts. This includes the following:
i. TAP1/CTAP2- compatible hardware security keys (e.g., a YubiKey).
- Any U2F-compatible hardware security keys can be seamlessly used with WebAuthn. ii. Android devices using screen lock authentication (e.g., fingerprint or PIN). iii. Windows Hello (e.g., fingerprint, facial recognition, or PIN) on Windows devices with a valid Trusted Platform Module (TPM). WebAuthn registration and login are only available in Comet-Hosted Management Console and Self-Hosted Management Console using HTTPS, supported in all major modern browsers. Limitations: Comet does not support WebAuthn with: i. Apple Face ID and Touch ID ii. Internet Explorer 11
- Click the dropdown list and select ‘My Account’.
- Turn on the toggle next to Two-factor authentication (FIDO2 WebAuthn)
- Click on ‘+’
- Select the authentication method you want to use. If only one authentication method is available on the device you are using, you will not be prompted.
- Follow the on-screen prompts on your device to allow the Management Console interface to use the authenticator.
- If the registration succeeded, the interface would show as ‘WebAuthn token saved’. Click on ‘X’ to exit the interface.
Steps to update FIDO2 WebAuthn for Management Console
- Click on the ‘+’ icon under FIDO2 WebAuthn configuration.
- Follow the above steps to register a FIDO2 WebAuthn.
- Remove the old FIDO2 WebAuthn.
Steps to remove FIDO2 WebAuthn for Management Console
- Turn off the toggle next to Two-factor authentication (FIDO2 WebAuthn)
- Select the FIDO2 WebAuthn, then select ‘-’
External authentication sources
Please refer to this guide.
Multi-Factor Authentication for Comet Backup users
Time-based One-Time Password (TOTP) is supported as a multi-factor authentication for Comet Backup end-users using the desktop software.
| Role | Enabling TOTP for Comet Backup user | Disabling TOTP for Comet Backup user |
|---|---|---|
| Comet Management Console admin | No | Yes |
| Comet Backup user | Yes | Yes |
TOTP can only be enabled in the Customer Portal by the end-users. Comet Management Console admin cannot enable TOTP for a user.
Steps to enable TOTP from the Customer Web Portal:
- Log in to your Customer Web Portal with the user's credentials.
- On the top right corner, click on the username and click on ‘My account’.
- Enable 'Two-factor authentication (TOTP)’ by toggling it on.
- Scan the displayed QR code with any TOTP application or enter the code manually.
- Microsoft Authenticator (Android, iOS)
- Google Authenticator (Android, iOS)
- Aegis Authenticator (Android)
- 2FAS (Android, iOS, browser extension)
- Keeper (Android, iOS, browser extension, desktop application, web application)
- Bitwarden (Android, iOS, browser extension, desktop application, web application)
- Enter the six-digit code displayed on your TOTP application then click ‘Save’.
- Click on ‘Save changes’.


TOTP can be disabled either by the Comet Management Console admin or by Comet Backup users. If the user loses access to their authentication device, the admin can disable TOTP on their behalf.
Steps to disable TOTP from Comet Management Console
- Log in to your Comet Management Console then head to the 'Users' tab.
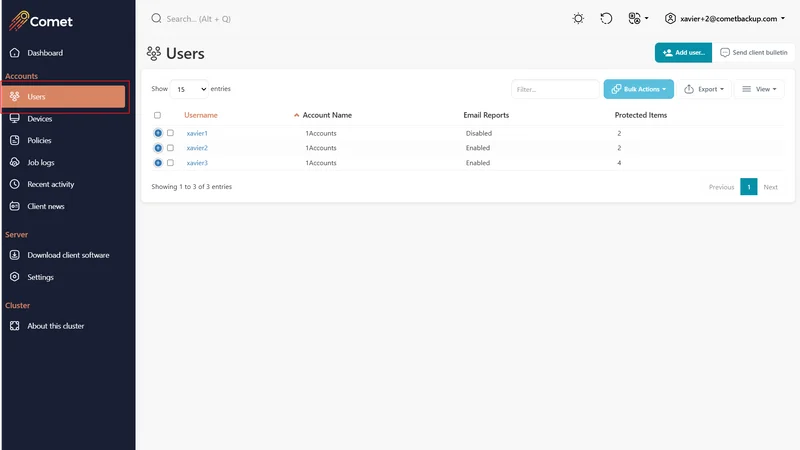
- Identify and select the user whose TOTP needs to be disabled.
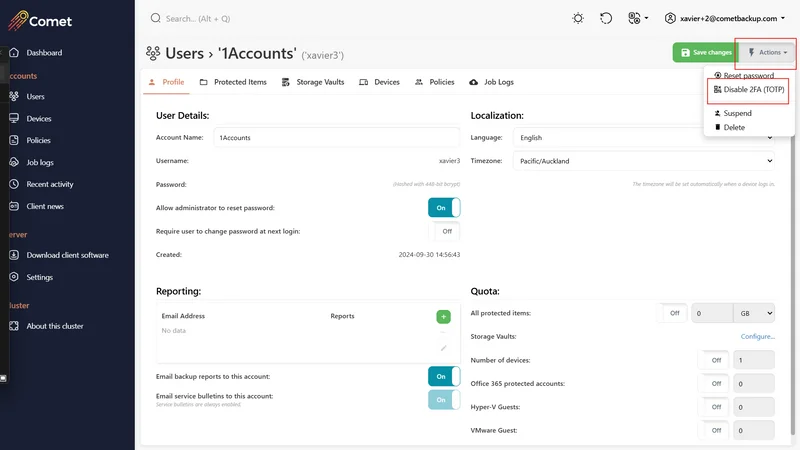
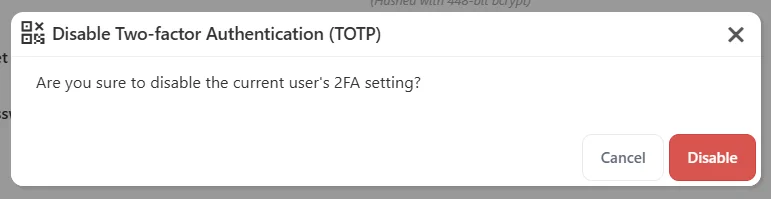
- Select 'Actions’ then ‘Disabled 2FA (TOTP)’ and then ‘Disable’.


Steps to disable TOTP from the Customer Web Portal
- Log into your Customer Web Portal with the user's credentials.
- On the top right corner, click on the username and click on 'My account'.
- Disable ‘Two-factor authentication (TOTP)’ by toggling it off then click ‘Save changes’.