Getting started with Self-Hosted Comet
Overview of Comet Backup
Basic concepts and overview
The Comet Backup system works on the client-server model. The Comet Management Console runs on a designated device, and this acts to manage, control, and monitor backup jobs from client devices.
New clients have an account created first, in the list of Users in the Comet Management Console. Client devices download and install the client software directly from your Comet Management Console, using the username and password from the client account.
When running, the client software maintains a constant, online link to the Comet Management Console, enabling on-demand and scheduled backups of data. The Comet Management Console also maintains records of your clients, the Protected Items, the Storage Vault location, and Storage Vault access credentials.
Setting up and configuring Self-Hosted Comet Management Console on a Windows platform

Install the server
Once you have downloaded and installed Comet Core, you will be presented with the Comet Core Service Manager app, and the First-Run Setup Wizard. This wizard will help get your Comet Management Console up and running. The Comet Management Console will then allow you to access the full range of configuration options on its main Settings page.
Windows Self-Hosted Comet Management Console activation
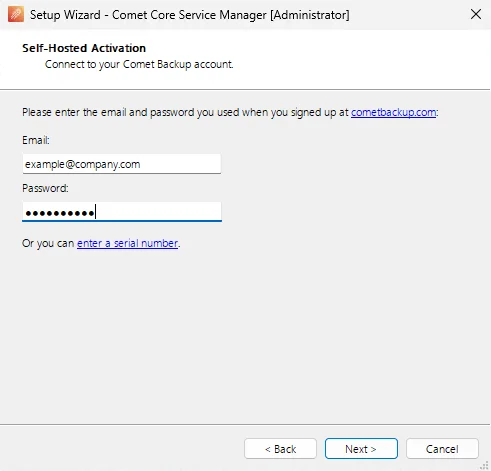
To validate your Self-Hosted Comet Management Console, please enter your account details into the Comet Core installer.
Alternatively, you can supply a serial number. Generate a serial from cometbackup.com. Log in to your Comet Account. On the Dashboard, select "My Servers" in the top menu, then click the "Add Service" button.
Web interface
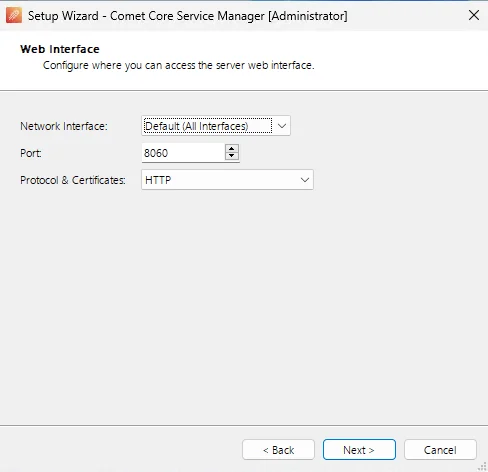
Comet Management Console is accessed via a web interface. From here you can configure access to the Server Web Interface. Please note the addresses in the drop down for the Server Interface. You can also configure SSL from this screen, or use our free automatically-renewing SSL certificate which integrates with LetsEncrypt, by selecting the 'Automatic' option.
Admin accounts
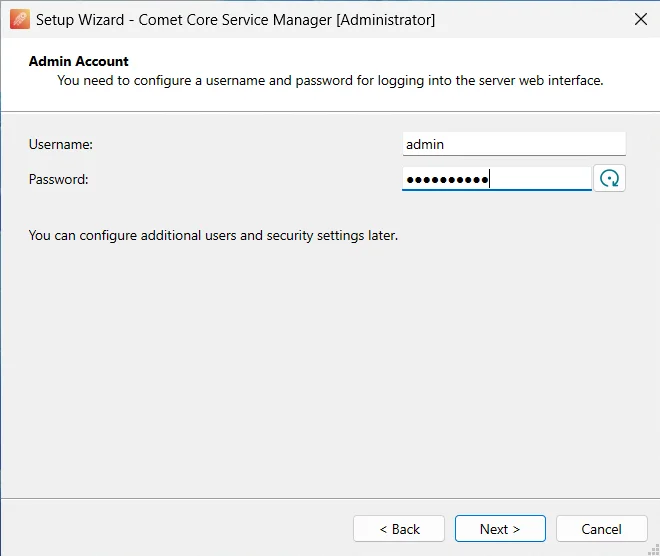
Configure administrative account access to your Comet Management Console. We strongly suggest changing the password of the admin user.
Customer data storage (Self-Hosted Storage Gateway)
Note: The same Comet Core install and Self-Hosted License can be used to run both the Self-Hosted Management Console and Storage Gateway
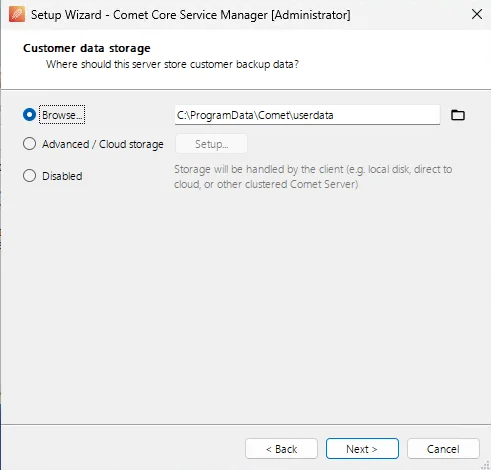
From this screen, you can select the storage location of where your Self-Hosted Storage Gateway will store the backup data.
If you want to send your backed-up data directly to your cloud storage, choose Disabled in the Storage Gateway settings page, then follow this guide after logging into your server web interface.
Wizard complete
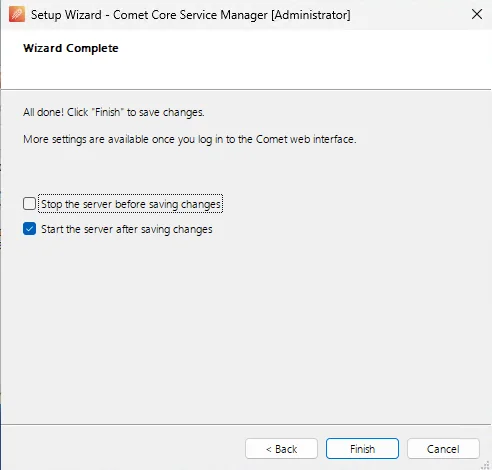
You have now setup the basic elements and are almost ready to start running a backup. Press 'Finish' and Comet will start. The Management Console can be accessed at the address specified in step 2.
Comet Management Console login

Login to the Management Console

After navigating to the address of your Comet Management Console in a browser, you will be able to login the server with the admin credential specified in step 3.
That covers the basics of setting up your Self-Hosted Comet Management Console and Storage Gateway to run a backup.