Getting started with Comet-Hosted
As the actual setup process of Comet-Hosted is automatic, this guide covers configuring your branding settings.
To get started, from the 'My Services' section in your Comet Account Portal, select 'Options' > 'Comet-Hosted Settings'.
This section will allow you to configure a custom domain and SMTP/DMARC settings for email reporting.

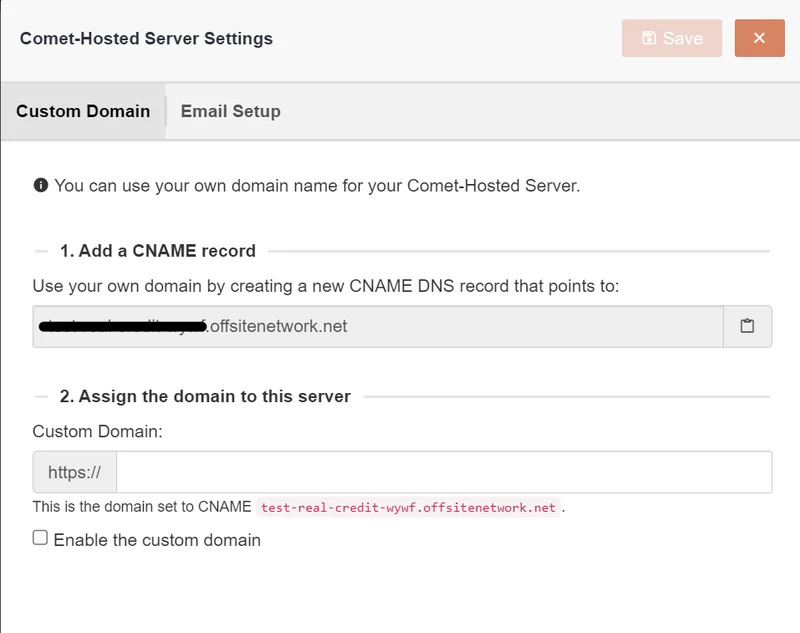
Custom Domain
Here you can configure the domain of your Comet-Hosted instance.
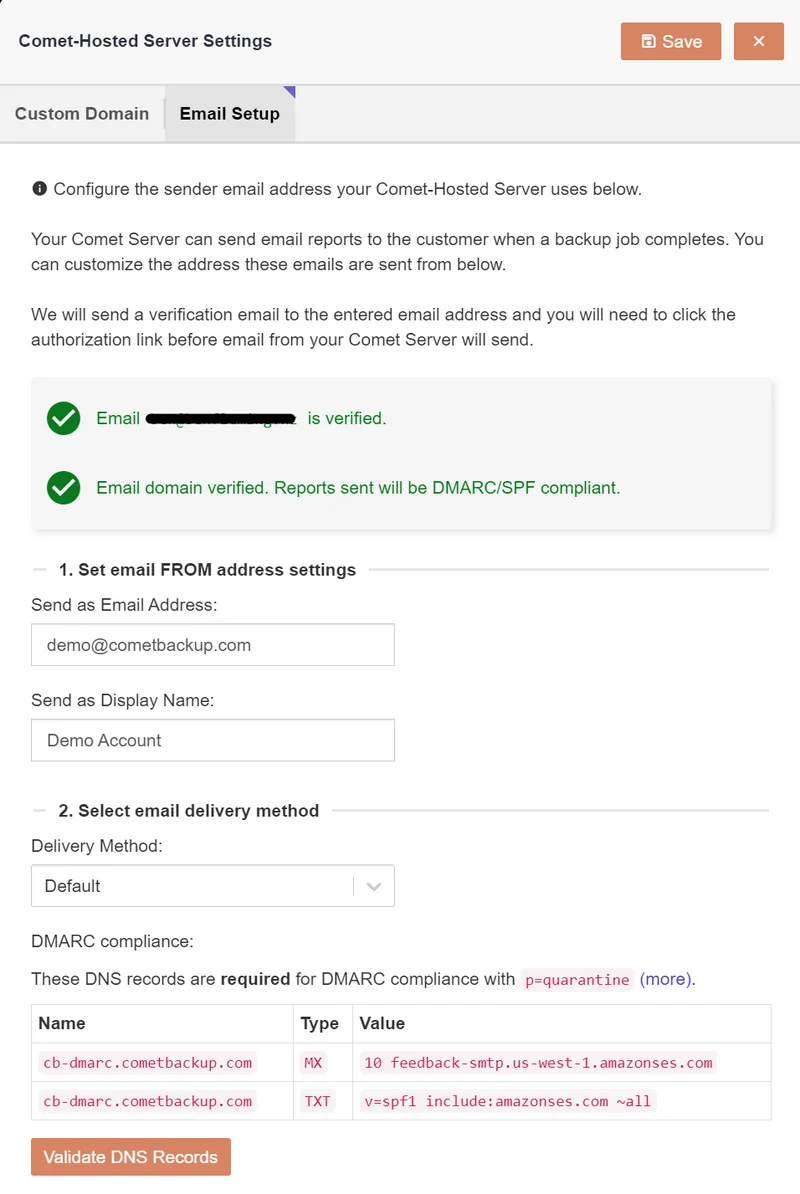
Email Setup
Here you can configure the email sending options. These are used for sending reports to end users or admins.
Delivery method: Default
The default email delivery method uses AWS SES to send emails on behalf of a verified email. During the creation of your Comet-Hosted Server you will recieve an Email Address Verification email from noreply@cometbackup.com. Click the link in this email to verify your send-as account.
To configure DMARC compliance when sending email reports from a Comet-Hosted Server you need to configure a couple DNS record on the top-level of your domain. This is recommended to prevent reports going to spam.
| Name | Type | Value |
|---|---|---|
cb-dmarc.<domain> | MX | 10 feedback-smtp.us-west-1.amazonses.com |
cb-dmarc.<domain> | TXT | v=spf1 include:amazonses.com ~all |
To confirm that these values are correct, click the 'Validate DNS Records' button. Note: Some providers may take up to 72 hours to propagate these changes.
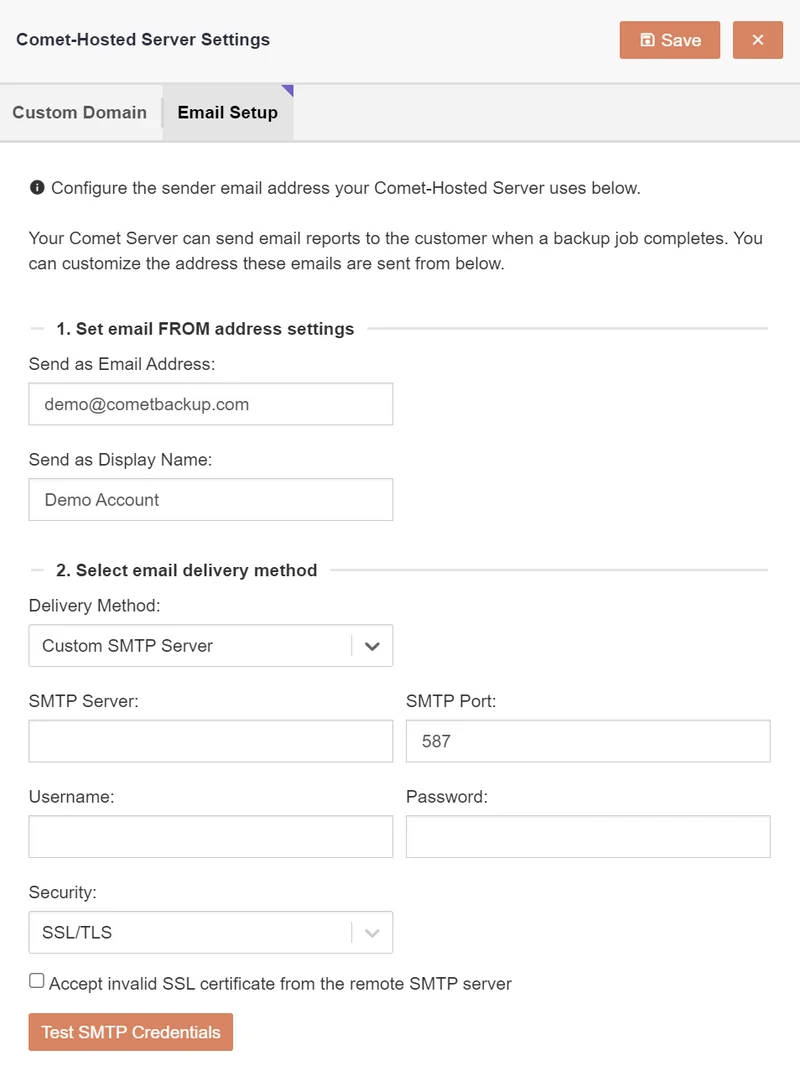
Delivery method: Custom SMTP Server
Use this option if you want to send emails using an Office 365 or Google SMTP relay.
If the default email deliver method does not suit your needs, it is possible to confirm email reports to be sent using a custom SMTP server. Switch the 'Delivery Method' option to 'Custom SMTP Server', and enter the authentication details for your custom SMTP server/relay. You can test that the server can connect to this server by clicking the 'Test SMTP Credentials' button.
Comet-Hosted Management Console branding
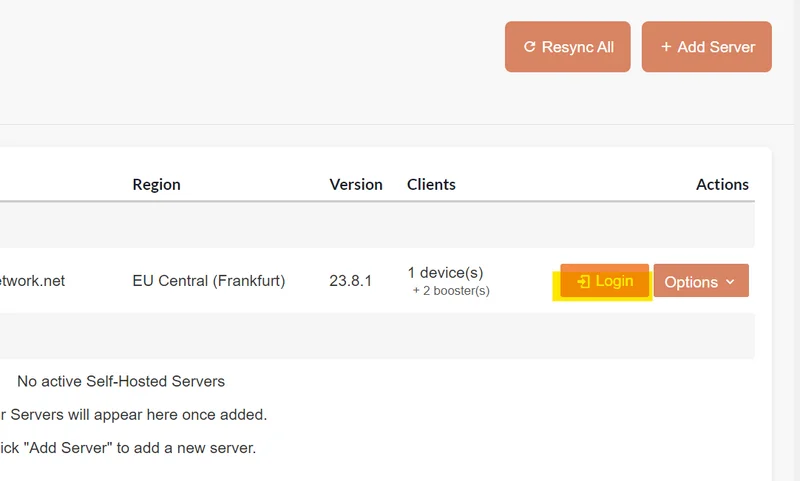
Login to your Comet-Hosted license
To login to your Comet-Hosted Management Console, click the 'Login' button on from the 'My Services' page.
Once you login to your Management Console, you will be able to access the Settings page to configure your branding settings for the server and client software. From here you can brand the appearance of your Comet-Hosted Management Console.

The top-left section of the Management Console can be configured to display either a Comet brand logo, custom text, or a custom image.
Desktop agent branding
In this section you can brand the appearance of the desktop client, add an EULA, configure a custom help page and more.

You have now completed the configuration options for your Comet-Hosted server.
Video tutorial
See our video guide on how to re-brand your Comet Management Console and backup client.
If you need any further support please open a ticket from inside the My Account section of cometbackup.com.