Comet Backup installation
Note: The Comet Management Console was previously referred to as the Comet Server.
Windows
System requirements
| Specification | Minimum | Recommended |
|---|---|---|
| CPU | x86 or x86-64 processor1 (minimum 4 cores/threads) with SSE2 and SSSE3 2 | x86 or x86-64 processor (8 cores/threads or more) |
| RAM 3 | 8 GB | 16 GB |
| OS | Windows 7 or newer | Windows 10 or newer |
| OS (Server) | Windows Server 2008 R2 or newer | Windows Server 2016 or newer |
| Hard Drive | SSD or NVME Drive | |
| Network 4 | 1 Mbps or faster download/upload speed | 1 Gbps or faster download/upload speed. |
1 The .exe installer supports both 'x86' or 'x86-64' while the .msi installer is 'x86-64' only.
2 SSSE3 required as of version 24.12.0 - Intel Core 2 Duo, AMD Bulldozer or newer.
3 Comet does not consume 8GB of RAM. Memory consumption varies depending on the job being run.
4 Links with high latency or unstable WAN connections are not recommended, as these impact both upload and download performance.
Windows XP / Server 2003
At the time of writing, there is no version of Comet available for Windows XP / Server 2003. All versions of Comet rely heavily on features that were only introduced in Windows Vista / Server 2008.
Windows XP / Server 2003 no longer receives security patches from Microsoft. It is unsafe to connect such a machine to the internet. If you are attempting to supply backup services to a customer in this situation, you should arrange to first upgrade their operating system with urgency.
You can work around this issue by
- installing Comet Backup on another machine, and then backup the XP machine over the network; or
- virtualizing the XP machine, and backing up the VM guest from the VM host. This also allows you to remove internet access from the XP machine.
Windows Vista / Server 2008
Support for Windows Vista was removed in Comet Backup 22.9.1. The final version of Comet Backup that runs on Vista or Windows Server 2008 is Comet 22.8.x or 22.9.0.
The Comet Management Console has a mandatory minimum TLS version of TLS 1.2. Windows Server 2008 users may require KB4019276 to continue accessing the Comet Management Console; this update is also required for ESU (Extended Security Updates) for Windows Server 2008.
Windows 7 / Server 2008 R2
Comet Backup continues to support Windows 7 and Server 2008 R2 and will install successfully on these operating systems. However, Microsoft ended Extended support for Windows 7, and Server 2008 R2 on January 14th 2020. Future versions of Comet may remove support for such older versions of Windows which are no longer under active security support from Microsoft.
In Comet 25.6.10 and later, the Universal CRT (UCRT) is required. This is installed automatically via Windows Update as KB2999226 (2015) and later updates. This is only available for Windows 7 SP1, not Windows 7 RTM. To continue using Comet on Windows 7, please ensure that your machine has all the last available Windows Updates installed.
Windows 8 / 8.1 / Server 2012 / Server 2012 R2
Comet Backup continues to support Windows 8, 8.1, Server 2012, and Server 2012 R2 and will install successfully on these operating systems. However, Microsoft ended Extended support for Windows 8, 8.1, Server 2012, and Server 2012 R2 on October 10th 2023. Future versions of Comet may remove support for such older versions of Windows which are no longer under active security support from Microsoft.
Installer type
The Comet Backup installer is offered as both an EXE and an MSI. The MSI installer was made available from version 25.6.0.
The MSI installer allows for integration with Windows GPOs, which can be useful for mass deployment and management. Due to some restraints in how MSI installers operate, the MSI installer is only offered when Windows codesigning is configured. Without codesigning, the MSI download button will be disabled for admins and removed for users.
If you require the MSI installer without codesigning, it can still be downloaded via the API endpoint using platform 22 or by going directly to the download address 'your_comet_server/dl/22'. Please note that without codesigning the download and installation will likely result in security warnings.
Installation
Run the CometBackup_install.exe file and follow the prompts.
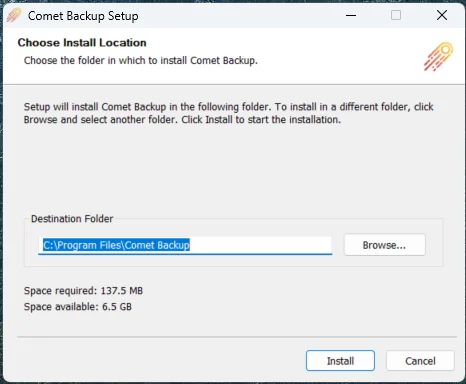
Once installed, the client software prompts for account details to log in.
Silent installation (Windows advanced)
Remote registration requires Comet 23.9.0 or later.
With remote registration (lobby mode) you can remotely register/assign the devices to a User profile, right from the Comet Management Console admin web interface.
- Command Prompt
install.exe /S /LOBBY - PowerShell
Start-Process -Wait .\install.exe -ArgumentList "/S /LOBBY"
If you wish to enable remote registration for previously installed clients, or rejoin the lobby after a client restart, you can run the following backup-tool command:
cd "C:\Program Files\Comet Backup"
backup-tool.exe login join-lobby [server-url]
The device will appear as "Unregistered" on the Devices page of the Comet Management Console. From here you can register it to a User Profile using the Register button on the right.

With username and password Comet allows you to install and configure the software silently, by running the following example via your remote management software. Silent installations must be started by running from the installer directory. Incorrect quotations may result in errors.
- Command Prompt
install.exe /S /CONFIGURE=user:password - PowerShell
Start-Process -Wait .\install.exe -ArgumentList "/S /CONFIGURE=user:password"
If you make a mistake with the username/password prompt, you can run the cd "C:\Program Files\Comet Backup"; echo "USER`nPASSWORD" | .\backup-tool.exe login prompt PowerShell command to re-enter login details. Please take care with the `n character separating the username and password.
With install token (passwordless) Comet also allows you to install the software and register the device silently, by running the following example via your remote management software. Silent installations must be started by running from the installer directory.
- Command Prompt
install.exe /S /TOKEN=installtoken - PowerShell
Start-Process -Wait .\install.exe -ArgumentList "/S /TOKEN=installtoken"
You can generate the installation token by calling API AdminCreateInstallToken and the token is for a single use only. It can be used to hide the username and password from the command-line parameters.
Other optional arguments
Disable shortcuts
Comet allows you to disable the software shortcuts for the silent installation, by adding command-line argument /SHORTCUT=disable. For example, if you want to install with token while no shortcuts are created, you can run the following command-line,
- Command Prompt
install.exe /S /TOKEN=installtoken /SHORTCUT=disable - PowerShell
Start-Process -Wait .\install.exe -ArgumentList "/S /TOKEN=installtoken /SHORTCUT=disable"
Disable tray icon
Comet allows you to disable the tray icon for the silent installation, by adding command-line argument /TRAYICON=disable.
Log on backup.delegate service as Local System account
Comet allows you to explicitly set backup.delegate service to log on as Local System account for the silent installation, by adding command-line argument /ISLOCALSYSTEM=yes
Set target login server
Comet allows you to set the target login URL for the Comet Management Console, by adding command-line argument /SERVER="https://example.com".
- Command Prompt
install.exe /S /CONFIGURE=user:password /SERVER="https://example.com" - PowerShell
Start-Process -Wait .\install.exe -ArgumentList "/S /CONFIGURE=user:password /SERVER=`"https://example.com`"
RMM deployment example scripts (Windows)
Example PowerShell script to deploy the client software in bulk with remote management software:
$dlPath = "C:\TEMP"
$serverURL = "https://example.com"

if (-not (Test-Path $dlPath)) {
    mkdir $dlPath
}
Set-Location $dlPath
Invoke-WebRequest -Uri "$($serverURL)/dl/2" -OutFile install.exe
Start-Process -Wait .\install.exe -ArgumentList "/S /LOBBY /SERVER='$($serverURL)/'"
Remove-Item -Path ".\install.exe"
Service account
Comet automatically creates a Virtual Account (NT SERVICE\backup.delegate) with all necessary permissions to back up files on the PC.
Isolating Comet Backup under a Virtual Account is supported on Windows 7 or later, and Windows Server 2008 R2 or later when that server is not a Domain Controller. On other machines (e.g. Windows Server 2008 RTM, and domain controllers) the backup service will run as LOCAL SYSTEM by default.
On a Domain Controller running Windows Server 2008 R2 or later, we recommend configuring a Managed Service Account inside Active Directory for the backup service. This allows you to isolate the backup service permissions in a password-less service account. You should apply this to the backup.delegate service (but not the backup.elevator service, used for software updates).
Upgrading
The installer will safely remove and upgrade any prior version of Comet Backup, including those with a different software branding.
If the product name is changed as a result of the installation process, the newly-branded software may be installed into the old-branded directory name. You can avoid this issue by completely uninstalling and reinstalling the software.
Silent upgrade (advanced)
You can silently upgrade the software remotely via the Comet Management Console interface, or by running install.exe /S via your remote management software.
Service account
If you customize the backup.delegate service to use any other user account, your changes will be preserved in any future software upgrade.
Uninstall
The software can be uninstalled via the "Apps and Features" section in the Windows Control Panel.
During this process, you may be prompted whether you wish to preserve any username/password credentials saved on this computer.
In Comet 21.9.10 and later, you can also remove the saved credentials manually by running the backup-tool.exe login disconnect command.
Silent uninstallation
You can silently uninstall Comet Backup for Windows by passing the /S command-line argument (e.g. "C:\Program Files\Comet Backup\Uninstall.exe" /S).
If you also want to remove the saved username/password credentials, add this command-line "C:\Program Files\Comet Backup\Uninstall.exe" /S /ISDELETECREDENTIAL=yes
macOS
System requirements
| Specification | Minimum | Recommended |
|---|---|---|
| CPU | x86_64 or Apple Silicon processor (minimum 4 cores/threads) | Apple Silicon processor (8 cores/threads or more) |
| RAM 1 | 8 GB | 16 GB |
| OS | macOS 12 "Monterey" | Latest version of macOS |
| Hard Drive | SSD or NVME Drive | |
| Network 2 | 1 Mbps or faster download/upload speed | 1 Gbps or faster download/upload speed. |
1 Comet does not consume 8GB of RAM. Memory consumption varies depending on the job being run.
2 Links with high latency or unstable WAN connections are not recommended, as these impact both upload and download performance.
For older macOS versions, the last supported releases were:
| macOS Version | Last Supported Voyager Release | Last Supported Quarterly Release | Notes |
|---|---|---|---|
| OS X 10.9 "Mavericks" | Comet 19.12.1 | Comet 19.11.x "Juno" series | |
| OS X 10.10 "Yosemite" | Comet 22.9.0 | Comet 22.8.x "Carme" series | |
| OS X 10.11 "El Capitan" | Comet 23.6.2 | Comet 23.5.x "Thebe" series | |
| macOS 10.12 "Sierra" | Comet 23.6.2 | Comet 23.5.x "Thebe" series | macOS 10.12.1 is required for Let's Encrypt's ISRG Root X1 |
| macOS 10.13 "High Sierra" | Comet 23.5.1 | Comet 26.4.x "Phoebe" series | |
| macOS 10.14 "Mojave" | Comet 23.5.1 | Comet 26.4.x "Phoebe" series | |
| macOS 10.15 "Catalina" | Comet 23.5.1 | Comet 26.4.x "Phoebe" series | |
| macOS 11 "Big Sur" | Comet 23.5.1 | Comet 26.4.x "Phoebe" series | macOS 11.0 is required for Apple silicon |
| macOS 12 "Monterey" | Currently still supported | Currently still supported |
Installation
The macOS operating system requires codesigning to be enabled in order to launch a downloaded .pkg file. If you have not configured codesigning for macOS, you will be unable to launch the installer. However, you can bypass this by right-clicking the .pkg file and choosing Open.
Run the Comet Backup.pkg file and follow the prompts.
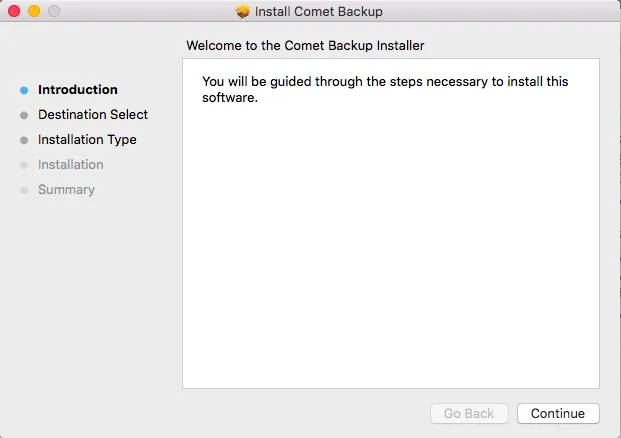
Once installed, the client software prompts for account details to log in.
If you are running the .pkg file from the Downloads directory, macOS will offer to move the .pkg file to the Trash after a successful installation.
Silent installation (macOS advanced)
Remote registration requires Comet 23.9.0 or later.
With remote registration (lobby mode)
By running the following script via your remote management software, you can remotely register/assign the devices to a User Profile, right from the Comet Management Console.
# Silently install the client software -
sudo /usr/sbin/installer -allowUntrusted -pkg "Comet Backup.pkg"  -target /

# Join the remote registration lobby -
# This is not a persistent connection and will NOT auto reconnect after a client restart
"/Applications/Comet Backup.app/Contents/MacOS/backup-tool" login join-lobby "https://<my-comet-server>.com/"
The device will appear as "Unregistered" on the Devices page of the Comet Management Console admin web interface. From here you can register it to a User Profile using the Register button on the right.
With username and password
By running the following script via your remote management software, you can silently register a macOS deivce to static User Profile.
NOTE: This does require the user (not admin) password to be plaintext on the client. We recommend using remote registration (lobby mode) to avoid this
PKG_NAME="Comet Backup"
COMET_HOST="https://<my-comet-server>.com/"
COMET_USERNAME="test_comet"
COMET_PASSWORD="<password>"

INSTALLER_PATH="$PKG_NAME.pkg"
BACKUP_TOOL_PATH="/Applications/$PKG_NAME.app/Contents/MacOS/backup-tool"

sudo /usr/sbin/installer -allowUntrusted -pkg "$INSTALLER_PATH"  -target /

(
    echo "$COMET_USERNAME";
    echo "$COMET_PASSWORD";
) | OVERRIDE_INSTALL_SERVER="$COMET_HOST" "$BACKUP_TOOL_PATH" login prompt
Silently granting Full Disk Access permission
macOS 10.14 Mojave and later have added a requirement to grant the "Full Disk Access" permission. macOS does not allow programs to set this permission automatically and it cannot be set as part of the silent install with the above instructions.
However, if you are intending to use the silent install feature via an RMM software that acts as the device's MDM (e.g. Jamf / Addigy / Meraki Systems Manager / ...) then you can set a Privacy Preferences Policy Control (PPPC) that remotely enables the "Full Disk Access" option for Comet Backup's application ID. The application ID for Comet Backup can be customized via your Comet Management Console as part of the macOS client branding settings.
RMM deployment example scripts (macOS)
Example Bash script to deploy the client software in bulk with remote management software:
#!/bin/bash
SERVERURL=https://example.com
REBRANDEDNAME="Comet Backup"
INSTALLERNAME=CometBackup.pkg

curl -o /private/tmp/CometBackup.pkg "$SERVERURL/dl/8"
sudo /usr/sbin/installer -allowUntrusted -pkg "/private/tmp/$INSTALLERNAME" -target /
"/Applications/$REBRANDEDNAME.app/Contents/MacOS/backup-tool" login join-lobby "$SERVERURL/"
rm "/private/tmp/$INSTALLERNAME"
Upgrading
The installer will safely remove and upgrade any prior versions of Comet Backup, including those with a different software branding.
Silent upgrade (advanced)
You can silently upgrade the software remotely via the Comet Management Console interface, or by running /usr/sbin/installer -allowUntrusted -pkg "Comet Backup.pkg" -target / via your remote management software.
Uninstallation
macOS does not have a standard system for uninstalling programs. However, you can still uninstall Comet by running the following command from a terminal window:
sudo -u root "/Applications/Comet Backup.app/Contents/Resources/uninstall"
This will automatically stop all running Comet processes, unregister Comet's launchd services, and remove all application files from the disk.
Uninstalling the software preserves any username/password credentials saved on this computer. If you also want to remove the saved username/password credentials, add this command-line:
sudo -u root "/Applications/Comet Backup.app/Contents/Resources/uninstall" --also-remove-saved-passwords
In Comet 21.9.10 and later, you can also remove the saved credentials manually prior to uninstallation by running the /Applications/Comet Backup.app/Contents/MacOS/backup-tool login disconnect command.
Linux (Debian, Ubuntu)
This feature requires Comet 23.12.5 or later.
Install Comet Backup using the Debian client package. The Debian package installs the Comet client binaries and a systemd unit script to start and stop the service. The installed service is named backup-tool.
See System Requirements below.
Installation
Install the package using apt install in the directory where the .deb file was downloaded. E.g.:
sudo apt install ./Comet_Backup-23.12.5.deb
The installer will
- Install the software into a branded
/opt/BRANDNAME/subdirectory - Prompt you for an initial username and password (if previous configuration was not found)
- Prompt you for the URL of the Comet Management Console to attach to
- Register the current Linux device using the provided Comet user account details
- Start running Comet Backup in the background.
Managing the service
The Comet service is installed with the name backup-tool. It can be managed using the standard systemctl commands. See this Red Hat article for reference.
Silent install (Debian package)
The deb package installer prompts for your login details using Debconf. For a silent install experience, you can pre-seed answers to the install questions by using debconf-set-selections.
Package compatibility
You can install the .deb package over the top of an existing Comet Backup installation that used the "Other distribution" (.run) package. The .deb installer will detect the existing installation and convert the settings appropriately.
If you install the "Other distribution" (.run) package over the top of an existing .deb install, Comet 23.12.5 or later will understand the previous .deb package and perform a safe conversion. Installing an earlier version of the .run package will result in a mixed installation. To avoid this, ensure to safely uninstall the .deb package first.
Uninstall
You can uninstall the package by running apt remove backup-tool.
By default, removing the package will preserve your saved credentials for future reinstall. To forget any saved configuration, run apt purge backup-tool. This command will also uninstall the package if it is still installed.
Linux (Red Hat Enterprise Linux (RHEL), CentOS)
This feature requires Comet 25.6.7 or later. For earlier versions, install Comet Backup using the "Other distribution" package.
Install Comet Backup using the RPM client package. The RPM package installs the Comet agent binaries and a systemd unit script to start and stop the service. The installed service is named backup-tool.
The package is tested to work on RHEL 7, 8, 9, 10 and compatible distros including CentOS, AlmaLinux, Rocky Linux, Oracle Linux, and CloudLinux OS.
See System Requirements below.
Installation
Install the package using rpm -ivh ./file.rpm in the directory where the .rpm file was downloaded. E.g.:
sudo rpm -ivh ./Comet_Backup-25.8.0.rpm
The installer will:
- Install the software into a branded
/opt/BRANDNAME/subdirectory - Start running Comet Backup in the background (logged out).
You must then log in to the Comet Backup service by running /opt/BRANDNAME/backup-tool login prompt. This command will:
- Prompt you for an initial username and password (if previous configuration was not found)
- Prompt you for the URL of the Comet Management Console to attach to
- Register the current Linux device using the provided Comet user account details
Managing the service
The Comet service is installed with the name backup-tool. It can be managed using the standard systemctl commands. See this Red Hat article for reference.
Silent install (RPM package)
The rpm package is non-interactive and can be used for a silent installation without any further configuration.
Package compatibility
You can install the .rpm package over the top of an existing Comet Backup installation that used the "Other distribution" (.run) package. The .rpm installer will detect the existing installation and convert the settings appropriately.
If you install the "Other distribution" (.run) package over the top of an existing .deb install, Comet 25.6.7 or later will understand the previous .rpm package and perform a safe conversion. Installing an earlier version of the .run package will result in a mixed installation. To avoid this, ensure to safely uninstall the .rpm package first.
Uninstall
You can uninstall the package by running rpm -e backup-tool.
By default, removing the package will preserve your saved credentials for future reinstall. To forget any saved configuration, run sudo rm -r /root/.config/backup-tool.
Linux NAS (Synology)
Since Comet 21.12.6, branded Synology SPKs can be generated and downloaded from the Comet Management Console. Comet offers two downloads for Synology: one for DSM 6 and one for DSM 7. Due to Synology packaging rules, these SPKs are not interchangeable.
SPKs are available for Synology NAS' which meet the following requirements:
- CPU: x86_64, i686, ARMv7, or ARMv8
- DSM version: 6 or 7
The Synology SPK does not include a graphical client. Instead, creating Protected Items and running backups and restores can be done from your Comet Management Console
Installation
DSM 6 only: Installation of packages published by any publisher must be allowed before Comet can be installed. This setting can be enabled from the Package Center; in Settings > General > Trust Level, select the "Any publisher" radio button and accept the settings.
Installation of Comet on a Synology NAS follows the same process as installing any other SPK:
- Open the Package Center
- If on DSM 6, ensure the settings noted above have been applied.
- Click "Manual Install" in the top right
- Upload the
.spkfile downloaded from the Comet Management Console- If on DSM 7, accept the prompt to allow the installation of a third-party package.
- Accept the license agreement
- Enter credentials the appropriate Comet Management Console and user
- If a previous version of Comet has been installed on the NAS and its settings were not removed when it was uninstalled, the installer will automatically detect the credentials. Leaving all fields blank will reuse the existing credentials; new credentials can also be entered as usual and will take precedence.
- Click "Apply" to complete the installation
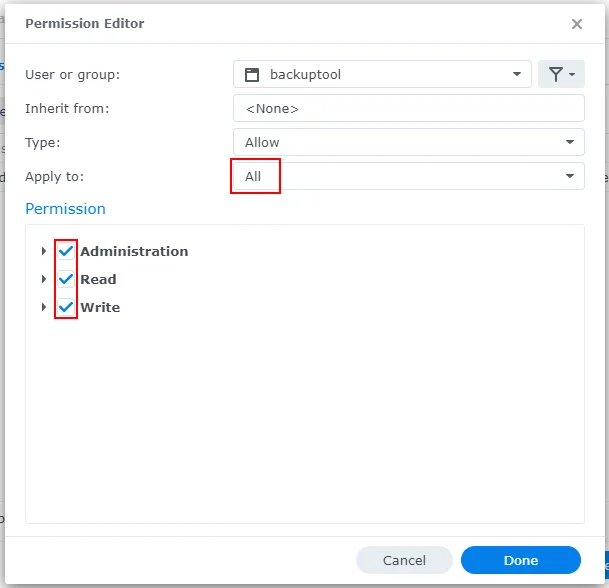
Permissions
On DSM 7, Comet runs a special package-specific user named backuptool. In order to perform backups
and restores, this user must be granted permissions to access the appropriate Shared Folders. This does not apply to DSM 6.

- Log in to the Synology NAS
- Open the Control Panel and go to Shared Folders
- Select the Shared Folder containing the data to be backed up and click Edit
- In the Permissions tab, select "System internal user" from the dropdown menu on the left

- For the user
backuptool, click the checkbox in the Custom column - In the dialog that appears, ensure the following:
- "Apply to:" is set to "All"
- All permissions are checked

Limitations
Due to restrictions placed on packages by Synology for DSM 7, Comet runs as a special package-specific user, which results in some limitations:
- Remote upgrade/uninstall is not supported. This is because third-party SPKs are no longer allowed to run as root, which means Comet cannot initiate a package upgrade/uninstall from within a package itself. To upgrade, install the new version manually in place of the old version.
- When performing a restore to a Synology NAS, permissions/ownership may not be restored correctly. This is because a package user is not allowed to
chownto a user other than themselves.
After installation
The Synology SPK does not provide a graphical client for Comet. Creating Protected Items and manually running backups or restores is done from the Comet Management Console
Creating a Protected Item can be done from the Protected Items tab on the user's page:

Backups and restores can be run by selecting the connection to the online Synology device from the Devices tab on the user's page:

Video tutorial
Here is a video tutorial showing the steps to download the Comet Synology installer, and walks you through installation and how to configure a backup and restore from the Comet Management Console.
Linux (Other NAS)
Install Comet Backup using the "Other distribution" package.
Linux (Other Distribution)
This is a distribution-agnostic package that can be used if Comet does not have a more specific package available for your Linux distribution.
Please note that in order to avoid distribution-specific differences, the package does not automatically start on boot. You should configure your system to run the launch script in /opt/ on boot (e.g. via a systemd unit, upstart script, /etc/init.d/ script, or a line in init.rc).
System requirements
| Specification | Minimum | Recommended |
|---|---|---|
| CPU | x86 with SSE2 and SSSE3 1, x86-64 or ARM processor (minimum 4 cores/threads) | x86-64 or ARM processor (8 cores/threads or more) |
| RAM 2 | 8 GB | 16 GB |
| OS | Kernel 2.6.23 or later | Kernel 5.0 or later |
| Hard Drive | SSD or NVME Drive | |
| Network 3 | 1 Mbps or faster download/upload speed | 1 Gbps or faster download/upload speed. |
1 SSSE3 required as of version 24.12.0 - Intel Core 2 Duo, AMD Bulldozer or newer.
2 Comet does not consume 8GB of RAM. Memory consumption varies depending on the job being run.
3 Links with high latency or unstable WAN connections are not recommended, as these impact both upload and download performance.
Additional requirements
- Support for ISRG root X1 certificates for Let's Encrypt requirements
- Unique SSH host keys (This can be an issue with cloned VMs)
- Dependencies
bash,xz, GNUawk, and standard GNU/Linux system utilitiesca-certificatesandtzdata(see below)
ARM CPU support
Comet Backup is available for multiple ARM platform variants. The Comet Backup installer will select the best available binary for your hardware at install-time.
The following platform variants are supported:
| Platform | Description |
|---|---|
ARMv8l | ARM 64-bit (Aarch64), no glibc required |
ARMv7l | ARM 32-bit with vfp, and a glibc-based OS with the "hard-float" ABI (gnueabihf) |
ARMv6kl | ARM 32-bit with vfp, no glibc required |
Timezone database dependency
Comet Backup on Linux requires the OS to provide an up-to-date timezone database, to perform timezone calculations
- On many Linux distributions, installing the
tzdataortimezonepackage should be sufficient - Otherwise, Comet will look for a timezone database in all of the following locations;
/usr/share/zoneinfo/usr/share/lib/zoneinfo/usr/lib/locale/TZ
CA certificate database dependency
Comet Backup on Linux requires the OS to provide an up-to-date set of root certificate authorities, to validate HTTPS / SSL connections.
- On many Linux distributions, installing the
ca-certificatespackage should be sufficient - Otherwise, Comet will look for a certificate bundle in all of the following locations;
/etc/ssl/certs/ca-certificates.crt(used by Debian/Ubuntu/Gentoo etc.)/etc/pki/tls/certs/ca-bundle.crt(used by Fedora/RHEL 6)/etc/ssl/ca-bundle.pem(used by OpenSUSE)/etc/pki/tls/cacert.pem(used by OpenELEC)/etc/pki/ca-trust/extracted/pem/tls-ca-bundle.pem(used by CentOS/RHEL 7)
Installation
Run the .run file. This is a self-extracting archive, and will need to be executed in an elevated environment.
The installer will
- install the software into a branded
/opt/BRANDNAME/subdirectory - prompt you for an initial username and password
- register the current Linux device into that Comet account
- start running Comet Backup in the background.
If you make a mistake with the username/password prompt, you can run the /opt/BRANDNAME/backup-tool login prompt command to re-enter login details.
Prior to Comet 21.9.10, if you make a mistake with the username/password prompt should follow the instructions below to completely remove the software, and then start the installation again.
Linux Installation options
You can control the installer by setting environment variables in your shell before running the .run file.
The following options are available:
WRITE_INSTALL_LOG. Set this to a file path, to record details of the installation.OVERRIDE_INSTALL_SERVER. Set this to a URL (includinghttp/httpsand trailing slash) to override the Comet Management Console URL used by Comet Backup.
You can set an environment variable in bash either on the same line (e.g. WRITE_INSTALL_LOG=install.log ./Comet_Backup-xx.x.x.run) or as a separate export command (e.g. export WRITE_INSTALL_LOG=install.log followed by ./Comet_Backup-xx.x.x.run).
Silent installation (Linux advanced)
Remote registration required Comet 23.9.0 or later.
With remote registration (lobby mode)
By running the following script via your remote management software, you can remotely register/assign the devices to a User Profile, right from the Comet Management Console.
./Comet_Backup-xx.x.x.run --lobby
You can also silently rejoin the lobby, or configure a different Comet Management Console, using the following command: /opt/BRANDNAME/backup-tool login join-lobby [server-url]
The device will appear as "Unregistered" on the Devices page of the Comet Management Console admin web interface. From here you can register it to a User Profile using the Register button on the right.
With username and password
Comet allows you to install and configure the software silently. This allows you to remotely push client installations remotely, using your preferred remote management software.
To run the installer silently, run:
export COMET_USERNAME=xxxxexport COMET_PASSWORD=xxxx(echo $COMET_USERNAME; echo $COMET_PASSWORD;) | ./Comet_Backup-xx.x.x.run
NOTE: COMET_USERNAME and COMET_PASSWORD are for the user profile, not the Comet Management Console administrator.
You can also silently reconfigure the software using the same pipe syntax: (echo $COMET_USERNAME; echo $COMET_PASSWORD;) | /opt/BRANDNAME/backup-tool login prompt
Restarting at boot
The installer creates a backup-daemon-start.sh script that can start the service. The Comet Backup agent on "Other Distribution" Linux can be restarted by running the backup-daemon-start.sh script.
In order for Comet Backup to start after a system reboot, you must configure this script to be run on system boot. Different Linux distributions support different methods for running commands on system boot: choose the most appropriate method for your Linux distribution. Some common choices are documented below.
Preserve HOME environment variable
Comet uses the $HOME environment variable to find its saved credentials. When configuring Comet to start at system boot, ensure that the $HOME environment variable is set (i.e. to /root/), to ensure that Comet can find its saved credentials. If Comet is unable to log in, it's possible that your Linux distribution does not set $HOME at this early-boot stage. In that case, you should try running HOME=/root/ /opt/CometBackup/backup-daemon-start.sh & instead. Comet will automatically try to use /root/ as the $HOME directory if $HOME is not already set or if it is set to a blank path.
Note: If you execute the .run installation script as root, this may have different results than if you execute the .run script using an elevated terminal session with 'sudo'. The 'sudo' command preserves the $HOME variable on Ubuntu; whilst on Debian the $HOME variable is erased, and sudo then sets it to the home directory of the originating user.
Start in the background
If you are running commands over SSH, please be aware that the backup-daemon-start.sh script runs in the foreground and will die when the SSH session is closed. You can avoid this by running the script in the background.
You can run the script in the background (daemonize) by using the backup-daemon-start-background.sh file instead.
Startup via rc.local
You can make Comet Backup start at system boot by adding an entry to the rc.local file.
First, find the rc.local file on your system:
/etc/rc.local(Debian/Ubuntu)/etc/rc.d/rc.local(CentOS/RHEL)
Add the following content to the rc.local file:
/opt/CometBackup/backup-daemon-start.sh &
If the rc.local file contains an exit 0 statement, the additional command should be added before such a statement.
As of CentOS 7, the rc.local file is not executable by default. You should run chmod +x on the rc.local file to enable using this method for startup scripts.
Startup via rc.d
You can make Comet Backup start at system boot by adding a file to the rc.d directory.
First, find the rc.d directory on your system:
/usr/local/etc/rc.d(Synology DSM 6.1+)
Add a new file to the rc.d directory with the following contents:
#!/bin/bash
/opt/CometBackup/backup-daemon-start-background.sh
Mark the file as executable: chmod +x /usr/local/etc/rc.d/my-comet-startup-script.sh
Startup via cron
You can make Comet Backup start at system boot by adding an entry to root's crontab.
- Run
crontab -e -u rootto launch a crontab editor - Add the line
@reboot /opt/CometBackup/backup-daemon-start-background.sh
Startup via init.d
No further documentation is currently available for this topic.
Startup via systemd
You can use the following unit as an basic example:
[Unit]
Description=Comet Backup Client
After=network-online.target

[Service]
Type=simple
RemainAfterExit=true
KillMode=process
User=root
ExecStart=/opt/CometBackup/backup-daemon-start.sh

[Install]
WantedBy=multi-user.target
This unit file correctly starts the Comet Backup service at system boot.
However, the process management in systemd is not fully compatible with the way Comet's multi-process model works. In particular, there are compatibility issues with the software updater. As a result, the above unit is (A) unable to take advantage of process group cleanup; (B) unable to auto-restart the Comet Backup agent service; and (C) after a software upgrade, Comet will keep running but the unit will remain in "exited" state.
Autostart for graphical desktop application
In the "Other Distribution" package, the graphical application is not automatically configured to start when the desktop logs in. You may add backup-interface --background as an autostart command to your desktop environment's settings.
Upgrading
The "Other Distribution" version of Comet supports upgrading the software, with some caveats:
- The
.runfile will automatically upgrade the existing version - The software can be remotely upgraded via the Comet Management Console.
However, the existing service will only be replaced with the upgraded version if the product brand name is unchanged.
Note: If you delete the branded Comet directory and all its contents in /opt/, this will trigger a full-reinstallation of the client software, requiring the username and password.
Uninstall
To uninstall "Other Distribution" versions of Comet, you should
- Stop all Comet processes
- Remove the relevant subdirectory under
/opt/ - Remove any custom startup scripts
Change password on Linux client
Use the 'Change Password' function in the client web interface, or change the password in the admin web interface.
Then fully uninstall and reinstall the client, using the new credential. Your device settings and Protected Items will be preserved.
Graphical desktop application for Linux
This feature is available in Comet 21.3.6 and later.
By default, the Comet Backup application for Linux runs on the command-line only. You can control and configure the application via the web interface.
If you have a graphical Linux desktop environment (e.g. GNOME / KDE / XFCE, using X11 / Wayland), it is optionally possible to run the Comet Backup desktop application. In addition to the general Linux system requirements, use of this feature has the following additional requirements:
- x86_64 CPU architecture
- Qt 5.7 or later
- Glibc 2.24 or later
These Qt and Glibc versions are present on most Linux distributions from 2017 or later, such as Ubuntu 17.04 "Zesty Zapus", Debian 9 "Stretch", Fedora 25 Workstation, CentOS 8, and any more recent Linux distribution version.
On Debian 13 "Trixie" / Ubuntu 24.04 "Noble Numbat", you may need to install the following package dependencies:
apt-get install libqt5widgets5t64 libqt5svg5t64
On older versions of Debian / Ubuntu, you may need to install the following package dependencies:
apt-get install libqt5widgets5 libqt5svg5
On Fedora/CentOS, you may need to install the following package dependencies:
yum install qt5-qtbase.x86_64 qt5-qtsvg.x86_64
After installing Comet Backup for Linux for command-line usage, you can launch the /opt/CometBackup/backup-interface program. It is not necessary to launch this program as root; it will communicate with the installed Comet Backup background service regardless of what user account it runs as.