Comet Backup usage
NOTE: The Comet Management Console was previously referred to as the Comet Server.
Log in
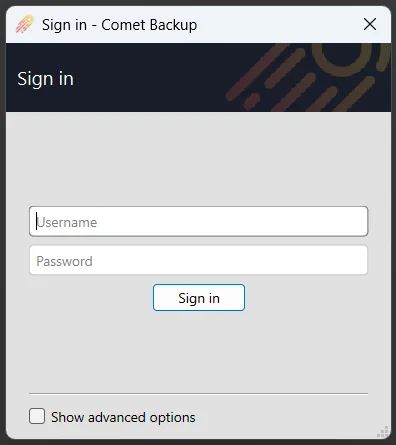
Enter the client's username and password, and click the button to log in.
Custom Comet Management Console address
The server address will be automatically filled, pointing to the Comet Management Console that generated the client software.
You can connect the Comet Backup application to a different Comet Management Console:
- Check the "Advanced Settings" option, to display the Server field
- Enter the server address.
- The address should include the protocol (
http/https); any non-default port; and a trailing forward-slash (/) character.
- The address should include the protocol (
Device registration
If this is the first time logging in to your Comet Backup account from this device, you will be prompted to register the device into your account.
Backup tab
Add a new Protected Item
To add a new Protected Item, mouse over the "Protected Items" text and click the "Add" button.
For more information about configuring a Protected Item, see the "User configuration" section. No changes are applied until the Save button is pressed.
Edit an existing Protected Item
To edit an existing Storage Vault, either double-click the row, or right-click the row and choose Edit.
For more information about configuring a Protected Item, see the "User configuration" section. No changes are applied until the Save button is pressed.
Back up data
Data should be backed up automatically on schedule as per the schedule setting options above. The backup schedules will still run even if logged out of the client GUI, as the background service will stay logged in.
At times, you may wish to immediately start a backup job, or back up to a different Storage Vault than usual. You can back up any Protected Item to any Storage Vault as follows:
- Click a Protected Item, and click the Backup Now button
- Step through the wizard to select a destination Storage Vault
- The backup job starts within the main window interface.
Restore tab
Clicking the Restore tab opens the Restore dialog. Multiple actions are possible from within the Restore dialog:
Restore data
You can restore data from any Storage Vault as follows:
-
Click the Restore button in the left-hand menu bar
-
Select the Storage Vault containing the backed-up data, and click Next
-
Select the Protected Item that you want to restore, and click Next
- (Optional) Unfold the Protected Item to pick a snapshot other than the most recent
- (Optional) Use the Search button to search for files to restore
-
Select which files to restore, and click Next
- (Optional) By default, all files are restored. You can use the "Choose files" radio option to select individual files or folders to restore.
-
Select the destination path to restore to, and click Next
- The restore job starts within the main window interface.
If you are restoring from a Protected Item that is known to your current device, the progress operation will appear on the Backup tab under the Protected Item in question. If you are restoring from a Protected Item that is unknown to your current device, the progress operation will appear on the Account tab under the Storage Vault in question.
Restore types
When restoring files, you can choose to restore data as:
- Files and Folders
- The files you selected for restore will be restored from the Storage Vault to the local harddrive in the path you have selected.
- Restore location:
- Custom file path
- Restore to original paths
- The selected files will be restored to their original on-disk locations. Only available if the necessary original path information was preserved during the backup job; this is the case for all "File and Folder"-type backup jobs.
- This option is not presently available for Protected Item types other than "File and Folder" and will be greyed-out in the user interface.
- Overwrite existing files:
- If the restored file is different (>= 24.3.1)
- Any file that already exists and has different content will be silently overwritten with the restored file.
- If the restored file is newer
- Any file that already exists and has an older timestamp will be silently overwritten with the restored file.
- Always
- Any file that already exists will be silently overwritten with the restored file.
- Never (skip existing files)
- Any file that already exists will be silently skipped from the restore operation.
- If the restored file is different (>= 24.3.1)
- Simulate restore only
- The files you selected for restore will be downloaded from the Storage Vault, and reassembled, but not saved onto the local harddrive. This option can be useful as a test of the restore process.
- Program Input
- The files you selected for restore will be streamed as the standard input (
stdin) to a command-line program. - If you have selected multiple files for restore, you can choose whether they will result in multiple commands being run sequentially, or if the files are virtually archived before streaming into a single command-line program.
- The files you selected for restore will be streamed as the standard input (
- Compressed archive file (zip / tar)
- The files you selected for restore will be restored from the Storage Vault to an archive file on your local harddrive.
- If you select a compressed archive format, the files will consume less space on the local disk. No spool space is required when using a compressed archive format. This may be particularly useful for restoring large, highly compressible files (e.g. SQL dumps with repeated INSERT statements, or non-sparse disk images containing zero extents).
- The following file formats are available:
- zip (compressed)
- tar (uncompressed)
- The tar file format has had many different specifications, from
V7(1979),oldgnu(1992),GNU(1997),USTAR/POSIX(1998), toPAX/POSIX(2001). Comet uses POSIX 1003.1-2001 (pax) TAR format files to preserve fidelity of file metadata. If your tar program does not fully support PAX extensions, you may see a hiddenPaxHeader.0directory.
- The tar file format has had many different specifications, from
- tar.gz (compressed)
- tar.zst (compressed)
- This option uses the Zstd compression algorithm to provide better performance and compression ratio than a traditional tar.gz file.
- sqfs (compressed)
- SquashFS is a compressed archive file that can be mounted as a read-only virtual drive, using
mounton Linux. This allows you to work with the compressed data while only requiring a low amount of physical disk space. Third-party programs are available for Windows to allow mounting zip files as virtual drives for a similar effect (e.g. WinArchiver Virtual Drive).
- SquashFS is a compressed archive file that can be mounted as a read-only virtual drive, using
- Granular restore (Disk Image, Hyper-V, VMware only)
- If you are restoring a Protected Item that contains virtual disk files, choose this option to extract individual files from the disk's filesystem. Read more
- MySQL (MySQL only)
- If you are restoring a MySQL Protected Item, choose this option to stream the restore data directly back into a MySQL server.
- The connection settings will be prefilled from your current Protected Item settings, if any.
- Microsoft SQL Server (Microsoft SQL Server only)
- If you are restoring a Microsoft SQL Server Protected Item, choose this option to stream the restore data directly back into a Microsoft SQL Server instance.
- The connection settings will be prefilled from your current Protected Item settings, if any.
- Office 365 (Office 365 only)
- If you are restoring an Office 365 Protected Item, choose this option to restore emails back to the cloud instead of local files.
- Disk Image restore (Disk Image only)
- Choose this option to restore disk image data directly back to physical disks. For more information, see the Disk Image Protected Item guide.
- Disk Image format conversion (Disk Image only)
- Comet's Disk Image Protected Item type backs up your physical disks and partitions using the vmdk file format. Additional options are available to transform the file format to Hyper-V compatible
vhdxfiles or VMware ESXi-compatiblevmdkfiles.
- Comet's Disk Image Protected Item type backs up your physical disks and partitions using the vmdk file format. Additional options are available to transform the file format to Hyper-V compatible
- Hyper-V (Disk Image, Hyper-V, VMware only) (>=25.2.0)
- Choose this option to restore VMs from the backup job directly into the local Hyper-V instance.
- As part of the restore process, format conversion may occur.
- VMware and Disk Image Protected Items will automatically undergo format conversion to Hyper-V's
vhdxfile format. - Hyper-V avhdx chains will be flattened into a single vhdx file. Checkpoints are not restored when using this option.
- VMware and Disk Image Protected Items will automatically undergo format conversion to Hyper-V's
- You will be prompted to enter a local path for the resulting
vhdxfiles to be restored into.- If you have previously created Hyper-V VMs using Hyper-V Manager, the default path is often
C:\Users\Public\Documents\Hyper-V\Virtual Hard Disks.
- If you have previously created Hyper-V VMs using Hyper-V Manager, the default path is often
- The restored VMs will be registered as new VMs. Depending on the original backup, they may be Generation 1 (BIOS) or Generation 2 (UEFI).
- VMware (Disk Image, Hyper-V, VMware only) (>=25.2.0)
- Choose this option to restore VMs from the backup job directly into a network-accessible VMware vSphere hypervisor. Both ESXi and vSphere are supported targets for restore.
- As part of the restore process, Hyper-V and Disk Image Protected Items will automatically undergo format conversion to VMware's
vmdkfile format. - If the backup job was originally a VMware Protected Item, the connection settings will be prefilled from your current Protected Item settings.
- As well as the connection settings, you must select a Datacenter, Host, Datastore, and Network for the newly created VMs.
- You can use the Browse button to select these resources from the connection.
- For each of these settings, if there is only one possible option, it will be chosen automatically.
Remove a single backup snapshot
You can remove a single snapshot from within a Storage Vault as follows:
- Click the Restore button in the left-hand menu bar
- Select the Storage Vault containing the backed-up data, and click Next
- Identify the Protected Item snapshot that you want to remove from the Storage Vault, expanding the selection as necessary
- Right click the Protected Item snapshot, and select "Delete this snapshot"
Comet will remove the snapshot from the Storage Vault, and then immediately clean up unused data within the Storage Vault to save on disk space.

Restore a Protected Item from a different device
- Install the client software onto the second device, login using the user-profile username and password of the first device. If a new device, this will register a new device into the user-profile
- Open the Restore section of the client software, tick 'Show items from other devices'. Then click the 'Refresh' button top right to show the available snapshots from the first device
- Choose the snapshot you want to restore, and restore to a location of your choosing.
- Note: Devices will not attract fees or charges unless the device has Protected Items or performs a backup.
- Note: If the first user-profile has a Policy which adds default Protected Items, the second device will be have Protected Items, and will attract charges. You can temporarily disable the Policy from the user-profile so that any default Protected Items are not added to the test device when it registers for the first time.
Restore an accidentally-deleted Protected Item
- Login using the user-profile username and password of the first device. If a new device, this will register a new device into the user-profile
- Open the Restore section of the client software, tick 'Show unknown items'. This will list snapshots which are available, but have no detail, because they have been deleted from the list of Protected Items.
- Choose the snapshot you want to restore, and restore to a location of your choosing.
Job logs
Click on the Protected Item to access all job logs for that item.
Account tab
The account tab shows
- A list of your Storage Vaults, where data can be stored
- A list of devices registered within your account
- Additional actions ("Account" button; "Import" button; and the software version number).
Add a new Storage Vault
To add a new Storage Vault, mouse over the "Storage Vaults" text and click the "Add" button.
For more information about configuring a Storage Vault, see the "User configuration" section. No changes are applied until the Save button is pressed.
Edit an existing Storage Vault
To edit an existing Storage Vault, right-click the row and choose Edit from the context menu.
Operations on Storage Vaults
Further operations are available under the "Advanced" sub-menu when you right-click a Storage Vault.
Apply retention rules now
Comet will automatically perform a retention pass after each backup job. You can immediately run a retention pass by choosing the "Apply retention rules now" option.
Rebuild indexes
This is a technical feature to repair a specific type of potential issue. It is safe to use at any time, but should generally only be used if your support agent recommends it.
Account dialog
The Account dialog allows you to configure your username, password, privacy, language, timezone, and email settings. For more information, please see the "User configuration" section.
Lock and disconnect
The Comet Backup Client allows you to view and manage your backup settings. However, backup jobs will continue to run in the background even when the desktop app is closed.
- Use the Close button to close the desktop app, without logging out or locking the app. The app can be launched again and will open to the main screen, not the login screen. Backup jobs will continue to run in the background.
- Use the "Lock" button to log out of the desktop app, while still allowing backup jobs to run in the background. The app can be launched again and will open to the login screen, with the username pre-filled.
- Use the "Disconnect" button to log out of the desktop app and also from the background service. Scheduled backup jobs will no longer run. The app can be launched again and will open to the login screen, with no username pre-filled.
Importing data
Comet Backup will scan your local device for certain online backup products from other software vendors. If a supported product is found, you may be prompted to import settings from the detected product.
For more details about supported products, please see the Importing backup settings from other products section in the Appendix.