Self-Hosted Comet installation (Management Console and/or Storage Gateway)
Note: The Management Console previously referred to the Auth Role feature of the Comet Server. Note: The Storage Gateway previously referred to the Storage Role feature of the Comet Server.
The Comet installer (known as Comet Core on Windows) allows the Self-Hosted installation of the following features:
- Management Console
- Storage Gateway
- Cluster Manager
These features are always installed, and can be enabled/disabled using settings / API or configuration file changes.
System requirements
- CPU:
- x86_64 or ARM64 CPU architecture.
- Minimum of 4 CPU cores required.
- RAM:
- Minimum of 4GB required. (RAM usage scales with server load)
- 16 GB of RAM is recommended.
- Operating System:
- Windows 10 or newer.
- Windows Server 2016 or newer.
- Ubuntu 16.04 or newer.
- Debian 8 "Jessie" or newer.
- CentOS 7 or newer.
- Any other recent Linux operating system version. (Released 2016 or later)
- Must support ISRG Root X1 certificates to communicate with the licensing system.
- Disk space:
- Approximately 1GB for the server software application itself. This includes storage space for customer metadata, job history logs, etc.
- Additional storage space is required if you would like to bring your own storage. See Self-Hosted Storage Gateway for more details.
- Internet access
- Minimum of
1 Mbpsor faster download/upload speed is required.1 Gbpsor faster download/upload speed is recommended. - Self-Hosted Comet needs internet access to contact the licensing system. See Licensing for more detail.
- The licensing system uses Let's Encrypt for SSL certificates. Only operating systems that trust ISRG Root X1 certificates will be able to validate. See: https://letsencrypt.org/docs/certificate-compatibility/
- Minimum of
Windows
Run the installer file and follow the prompts.
By default, the software is installed into the C:\Program Files\Comet Server or C:\Program Files\Comet Core directory. Configuration files and log files are stored in the C:\ProgramData\Comet directory.
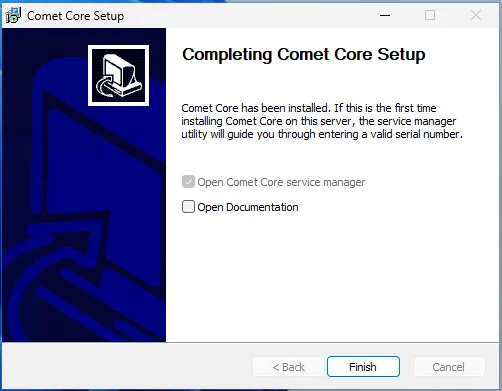
Before starting Comet for the first time, a serial number must be entered, as described in following sections.
Once the Comet software is installed, it can be started via
- Comet Core Service Manager (recommended), or
- the Services snap-in, or
- via the Services tab in Task Manager.
For troubleshooting purposes only, Comet can be started from an interactive terminal:
- Open a command prompt as Administrator
- cd
C:\Program Files\Comet ServerorC:\Program Files\Comet Core cometd -Chdir C:\ProgramData\Comet
Upgrading
To upgrade Self-Hosted Comet on Windows, run the updated installer file. The old version will be uninstalled and replaced with the new version. Your configuration will be preserved. Any running backup jobs should resume automatically.
Linux - DEB
Self-Hosted Comet is available as a .deb package for Debian and Ubuntu Server.
Install by running dpkg -i cometd_x.y.z_amd64.deb ; apt-get -f install (replacing x.y.z as appropriate based on the downloaded .deb filename).
The package installs into /opt/cometd/, but otherwise respects standard Debian policy:
- The configuration file is a symlink at
/etc/cometd/cometd.cfgto/var/lib/cometd/cometd.cfg. - Database files are stored in
/var/lib/cometd/. - The system log files are stored in
/var/log/cometd/. - Standard
serviceor systemdsystemctlcommands can be used to start, stop, restart, and view logs for the system.
Compatibility
The .deb package supports Ubuntu Server 16.04, 18.04, 20.04, 22.04 or compatible; and Debian 6 "Squeeze", 7 "Wheezy", 8 "Jessie", 9 "Stretch", 10 "Buster", 11 "Bookworm" or compatible. The package supports both SysVinit and systemd. End-of-life debian-based products may continue to work, however, continued support and compatibility cannot be guaranteed.
The package may be compatible with future versions of Debian and Ubuntu, and compatible derivative distributions; however, this cannot be guaranteed at the time of writing.
Upgrading from SysVinit to systemd
When upgrading from a distribution using SysVinit or Upstart (e.g. Debian 6, Debian 7, Ubuntu 12.04, Ubuntu 14.04) to a distribution using systemd (e.g. Debian 8, Ubuntu 16.04), the Comet unit is not enabled in systemd and will not start automatically. You can resolve this issue by
- reinstalling the Comet package, or
- upgrading the Comet package to the latest version, or
- running
systemctl enable cometd
Upgrading
To upgrade Comet on Debian-based distributions, install the updated .deb file. The old version will be uninstalled and replaced with the new version. Your configuration will be preserved. Any running backup jobs should resume automatically.
Silent installation
You will need:
- The new Self-Hosted Comet serial number (in the form of "XXXX-XXXX-XXXX-XXXX-XXXX-XXXX")
- A means of remotely executing instructions on the target machine
To install the .deb package silently, follow these steps:
- Prefill your new serial number into debconf
echo "cometd cometd/serial-number string XXXX-XXXX-XXXX-XXXX-XXXX-XXXX" | sudo debconf-set-selections
- Install Comet
sudo DEBIAN_FRONTEND=noninteractive apt-get --fix-broken -yq install ./cometd_X.X.X_amd64.deb
- Restart Comet (only needed if reinstalling)
sudo service cometd restart
Linux - RPM
Self-Hosted Comet is available as an .rpm package for RPM distributions. The single .rpm package is designed to work on multiple Linux distributions that meet the following high-level requirements:
- Systemd
- It is not generally feasible to install
systemdon older Linux distributions (e.g. CentOS 6 / RHEL 6 and earlier).
- It is not generally feasible to install
- RPM with xz support
- The RPM installer uses
xzcompression, that is not supported on older Linux distributions (e.g. CentOS 5 / RHEL 5 and earlier).
- The RPM installer uses
The package uses typical file locations:
- The package installs into
/opt/cometd/ - Database files are stored in
/var/lib/cometd/- The configuration file is kept in this directory, with a helper symlink in
/etc/cometd/cometd.cfg
- The configuration file is kept in this directory, with a helper symlink in
- The server log files are stored in
/var/log/cometd/. - Standard
serviceor systemdsystemctlcommands can be used to start, stop, restart, and view logs for the server.
Installing
Use your distribution package manager to install the .rpm file and its dependencies:
DNF
DNF is the recommended package manager in Fedora 22 and later, CentOS 8, Red Hat Enterprise Linux (RHEL) 8, Oracle Linux 8, and others.
dnf localinstall ./cometd-*.x86_64.rpm- Edit
/etc/cometd/cometd.cfgto enter your serial number systemctl start cometd
YUM
YUM is the recommended package manager in Fedora 15 and later, CentOS 7, Red Hat Enterprise Linux (RHEL) 7, Oracle Linux 7, and others.
yum localinstall ./cometd-*.x86_64.rpm- Edit
/etc/cometd/cometd.cfgto enter your serial number systemctl start cometd
Zypper
Zypper is the recommended package manager in OpenSUSE 12, SLES 12 and later, and others.
zypper install --recommends ./cometd-*.x86_64.rpm- Choose to ignore warning that cometd rpm is unsigned
- Edit
/etc/cometd/cometd.cfgto enter your serial number systemctl start cometd
Other RPM/systemd distribution
The basic RPM program does not automatically install necessary package dependencies.
- Manually install dependencies
setcap,tzdata,ca-certificates,adduser/useradd
rpm -i ./cometd-*.x86_64.rpm- Edit
/etc/cometd/cometd.cfgto enter your serial number systemctl start cometd
Converting from "Other Distribution" to RPM package
The RPM package was introduced in Comet 19.3.9. If you were using Comet on an RPM-based Linux distribution prior to this version of Comet, you may wish to upgrade from the .tar.xz package to the RPM package.
The RPM is a repackaged version of Comet that installs it in a predefined, standardized way. But the actual content of the installation is the same as for the existing .tar.xz package; the program and all settings files are compatible.
The RPM
- installs Comet to the
/opt/cometd/directory - configures it to look for its database and configuration files under
/var/lib/cometd/ - creates helper symlinks in
/etc/cometd/and/var/log/cometd/to help system administrators find the configuration and log files, respectively - creates a
cometdsystem user/group to run the service - installs a startup script using systemd
Some of the above steps may have been optional in the .tar.xz package.
The RPM does not contain any settings files and will not overwrite any existing settings- or database files in any directory.
To migrate from the .tar.xz package to the .rpm package version, a safe set of rough steps should be:
- Stop the running Comet service
- Remove any custom startup script or systemd unit; if using systemd, run
systemctl daemon-reloadfor it to pick up on the removal - If your existing Comet installation used the
/opt/cometd/directory or the/var/lib/cometd/directory, rename them to something different (e.g./opt/cometd-previous/and/var/lib/cometd-previous/) - Install the RPM. The new Comet service does not start up automatically
- Move the
comet-*.dbfiles, thecomet-*.db3files, thecometd.cfgfile, the/resources/subdirectory, and (if present) the/autossl/subdirectory, all into place from the old configuration directory to the new configuration directory (/var/lib/cometd/)
- Example copy which preserves permissions, owner and group:
cd /opt/cometd-backup ; tar -cf - autossl comet-*.db* cometd.cfg resources | ( cd /var/lib/cometd ; tar -xpf - )
- Move the
/logs/subdirectory to the new logs directory (/var/log/cometd/) and ensure there is a symlink in place from/var/lib/cometd/logs/to this directory. The RPM should have created this symlink for Comet's use. - If you were using local disk storage, move the storage directory (default
/userdata/) back into place and/or check in thecometd.cfgfile that the Comet is looking in the correct location for local disk storage - Ensure that all the moved database/configuration files above are owned and/or writable by the new
cometduser account (e.g. by runningchown -R cometd:cometd /var/lib/cometd/) - Start the Comet service
Upgrading
To upgrade Comet on RPM distributions, install the updated .rpm file. The old version will be uninstalled and replaced with the new version. Your configuration will be preserved. Any running backup jobs should resume automatically.
Linux NAS (Synology, QNAP)
You can install Comet using the "Other distribution" package.
Linux (Other distribution)
If you are using a Linux distribution without an available package, your support agent will be unable to assist with any issues related to your specific operating system. Different Linux distributions use different service managers, init systems, user management scripts, and filesystem hierarchies; the following instructions are deliberately vague as a result.
The Comet Management Console and/or Storage Gateway software can be installed as follows:
- Create a new restricted user to run the application.
- Extract the provided archive.
- Set permissions on the extracted files to match the created user, and mark the
cometdbinary as executable.
- Set permissions on the extracted files to match the created user, and mark the
- Switch to the restricted user, and run the application once with the argument
-ValidateConfigOnly. This will cause a default configuration file to be generated. - Write a service management script (e.g. systemd unit file) to manage the service.
- Proceed to enter a serial number in the configuration file, as described in following sections.
On Linux, binding to ports below 1024 (e.g. the common 80 or 443) requires authorization from the root user. There are many ways to achieve this: for example, you can run setcap CAP_NET_BIND_SERVICE=+eip /path/to/cometd as root (requires kernel 2.6.24 or newer), or investigate the authbind package for more granular control.
The server can be started at any time, by either
- opening a terminal as the restricted user, and typing
./cometd; or - by starting the service using the service management script (e.g. systemd unit).
The latter should be preferred in general, but the former may be more convenient during initial configuration and for diagnostic purposes.
Comet for Linux requires the IANA timezone database to be available unpacked in the /usr/share/zoneinfo/ directory. This package is likely already installed by your distribution vendor.
- Alternative directories supported are
/usr/share/lib/zoneinfo/, or/usr/lib/locale/TZ/.
Docker
You can also run and manage your Self-Hosted Comet using Docker or any OCI-compatible container runtime. You can find the Docker installation instructions and examples on the Self-Hosted Comet for Docker GitHub page.
How to install the Comet using Docker:
Advanced
Command-line arguments
The Comet binary (i.e. cometd.exe on Windows / cometd on Linux) accepts a number of command-line arguments to configure its behavior.
-ValidateConfigOnly
This flag causes Comet to validate the cometd.cfg file, creating it if it does not already exist, and then exit immediately.
-LogAccesses
This flag causes Comet to add log entries for all HTTP accesses. This option can cause a lot of information to be generated and should be used sparingly when troubleshooting network issues.
-Chdir=C:/custom-path/
This flag causes Comet to look in a different directory for its read-write files, such as cometd.cfg and database files.
-Instdir=C:/custom-path/
This flag causes Comet to look in a different directory for its read-only files, such as /vendor/.
-WebrootDir=C:/custom-path/
This flag causes Comet to not use the built-in web interface, and instead use a custom web interface from the supplied directory. This option could be used to enable advanced customization of the web interface, or to disable the web interface entirely.
The built-in web interface is entirely API-driven; modifying or disabling the web interface in this way has no impact upon any other uses of the product (including backup or restore operations).
Changing Comet's temporary directory
The COMETD_TMPDIR option is available for Comet 24.3.8 and later.
Comet uses the local system's temporary directory for some cache files (System Self-Backup, Backup Agent Downloads, etc) during normal operation. The needed storage size is small; but on some devices (e.g. NAS with fixed-size /tmp/ mounts) the system's default temporary directory may be insufficient.
You can change the temporary directory Comet uses by -
- Setting
COMETD_TMPDIR=/some/other/pathin Comet's environment, or - Setting
tmpdir=/some/other/pathin Comet'scometd.inifile, or - Setting
TMPDIRin Comet's environment
Comet will check the TMPDIR options in order, or fallback to using /tmp.
For Linux installs:
$ echo -n "tmpdir=/some/other/path" > /var/lib/cometd/cometd.ini
Exit code
The Comet binary exits with code 0 on graceful shutdown, and, with any other exit code when a restart is desirable (both for configuration change and for unexpected failures).