Proxmox VE
This feature requires Comet Backup 25.6.8 or later.
This Protected Item backs up Proxmox virtual machines by connecting directly to a Proxmox VE cluster.
For each virtual machine selected for backup, Comet takes a snapshot of the VM, then streams all necessary files into the Chunking engine, optionally using Changed Block Tracking (CBT) for improved performance. Comet then frees the VM snapshot on the host. The machine running Comet Backup does not require any temporary disk space.
Performance
Disk data is streamed from Promox to Comet. This means a large amount of traffic takes place over the internal network. For the best performance, Comet Backup should be installed as a VM on the same Proxmox VE cluster and/or specific host that it is backing up.
You can choose how many VMs Comet backs up at a time. Backing up multiple VMs at a time may increase performance.
Changed Block Tracking can be used to read only blocks that have changed since the last successful backup. Additionally, unallocated disk areas are skipped (Standard and CBT) to further improve the backup performance.
Requirements
- Desktop Client
- Running on the same network as the target Proxmox Cluster
- Proxmox Cluster
- Proxmox VE 8.x
Authentication
Proxmox access is supported through the root account, or through a non-root user configured with the necessary sudo privileges
Configuring User Sudo Privileges
To use a non-root account to access the Proxmox cluster via Comet you need to set up a user on each node of the Proxmox Cluster and set up shared ssh keys.
On each server node:
- Create a user with a home directory and password (use the same username and password on every node)
useradd -m -s /bin/bash myuser
passwd myuser
- Add the user to the sudo group
usermod -aG sudo myuser
- Allow no-password access for the user through sudo
# Allow no password access for sudo
visudo

# add:
# Allow user access without password
myuser ALL=(ALL) NOPASSWD: ALL
Set up SSH On any node:
- Log in to a Proxmox Node as the new user
- Generate SSH key
ssh-keygen -t rsa -f ~/.ssh/id_rsa -N ""
cat ~/.ssh/id_rsa.pub >> ~/.ssh/authorized_keys
chmod 600 ~/.ssh/authorized_keys
- Copy the key to the other nodes in the cluster (replace
<ip-addr-node-n>with each node’s address):
ssh-copy-id myuser@<ip-addr-node-1>
ssh-copy-id myuser@<ip-addr-node-2>
...
ssh-copy-id myuser@<ip-addr-node-n>
You can now connect to Proxmox via Comet using either root credentials or this non-root user.
Backup
Protected Item Configuration (Comet Backup desktop app)
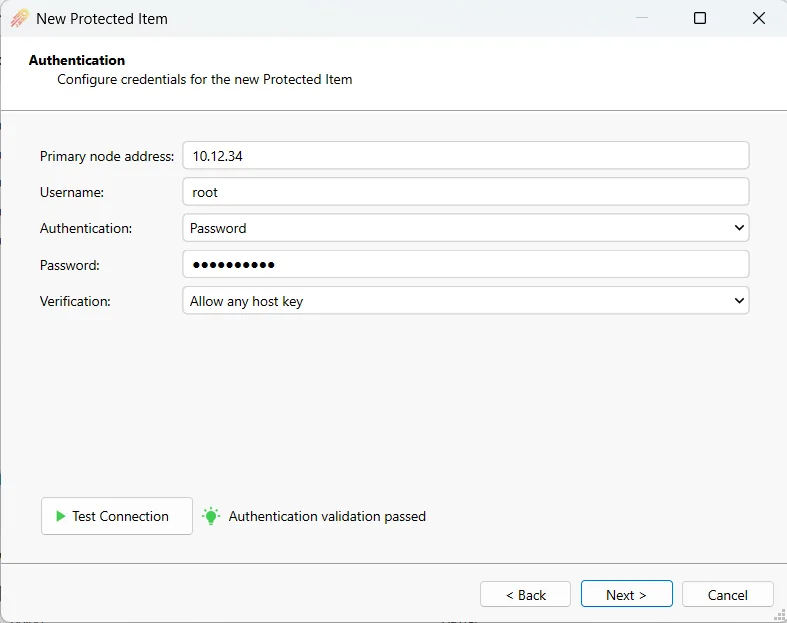
- Select Proxmox on the Protected Item list.

- Populate Proxmox cluster credentials.
-
Run
Test Connectionto check the connectivity of the client to the host. -
Use the picker to select which Virtual Machines from the Proxmox cluster to protect. Comet can protect all virtual machines and containers in a cluster, a single node of a cluster or individual virtual machines and disks.
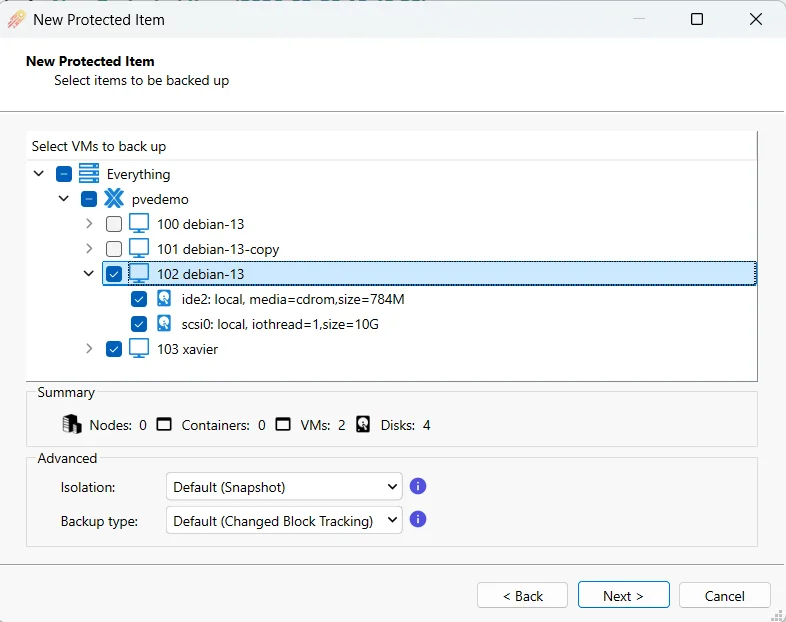
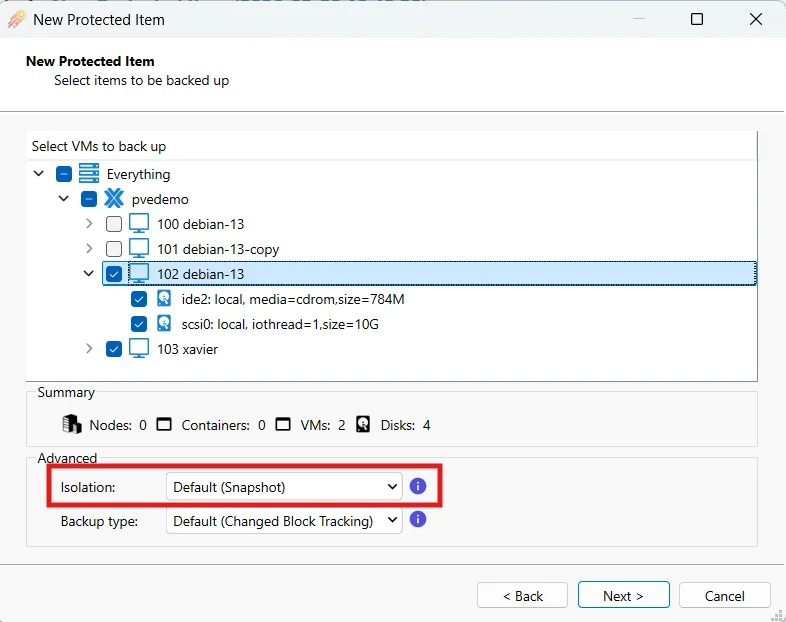
- Select the isolation method to use for selected containers. See isolation for more details on the possible modes.
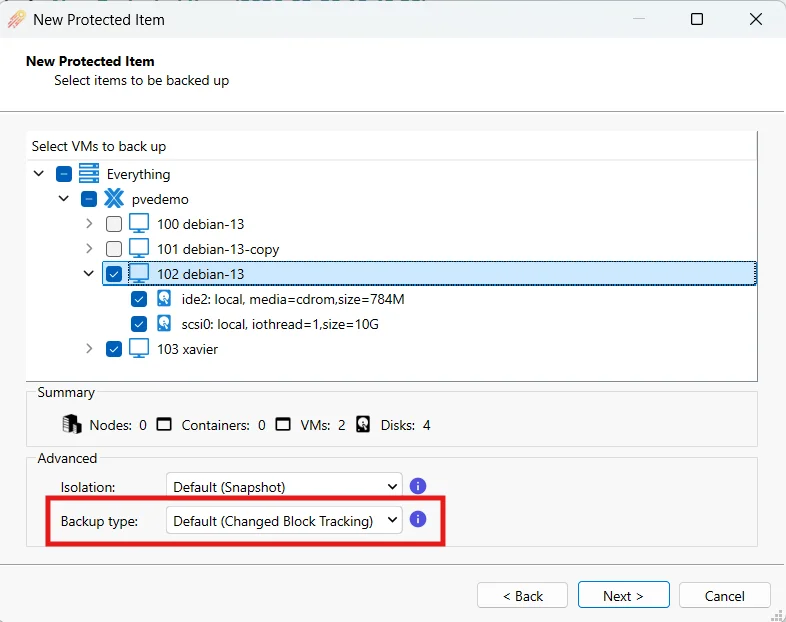
- Select the backup type - either Changed Block Tracking (default) or full backup. A full backup will back up all data on a disk whereas Changed Block Tracking will only back up blocks on disk which have changed since the last backup.
Isolation
When creating a backup, isolation mode determines how the container is handled during the backup process to ensure that
the data captured is consistent and not being modified while the backup runs. You can choose between different levels of
isolation depending on your storage type and tolerance for downtime.
Note: these options currently only apply to containers.
Default (Snapshot)
Take a temporary snapshot of the container. The container is not interrupted. This is the fastest and best option, however, it requires the container to be on a storage device that supports snapshots.
Stop
Stop the container during the backup job and restart it after the backup job completes. This is disruptive but it can work when the container is on a storage device that does not support snapshots.
Suspended
Suspend the container during the backup job and resume it after the backup job completes. This is disruptive but it can work when the container is on a storage device that does not support snapshots.
Restore
With a Proxmox Protected Item, you are able to restore the data in a number of ways. The key ones being:
- Direct restore to Proxmox
- Direct restore to Hyper-V
- Direct restore to VMware
- Granular Restore (pick individual files / folders from the guests vm to restore)
- Restore disk image files as
*.imgformat
Restore Directly to Proxmox
- Select Storage Vault, and then Protected Item to restore from

- Select Restore to Proxmox

- Select the Virtual Machines to restore

- Enter the credentials of the Proxmox cluster you would like the VM to be restored to.

- Once the destination credentials have been configured, you can live browse the destination node and storage that the VM will be restored to.

- Click restore to restore the selected VM(s) to the configured destination.